Sew Suite

Sew Suite

Here is the 4th item in my 12 Gifts of Christmas series. I’ll be adding several more gift ideas over the weekend, beginning Friday when I will be participating in a blog tour that is highlighting Christmas Gifts!

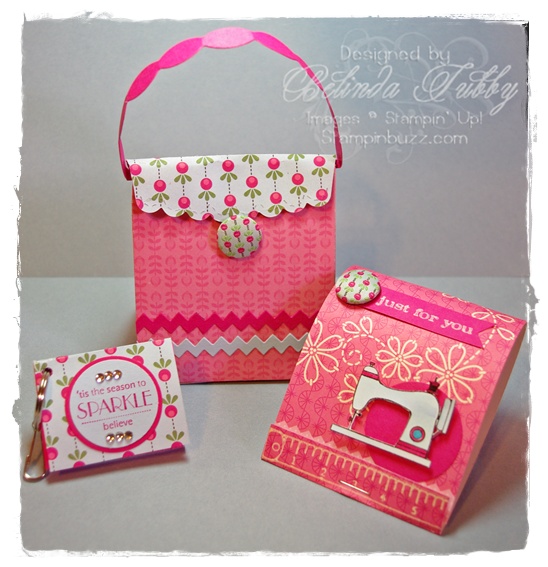
This sweet little gift features a sewing kit and mini post it note key ring which fit nicely in this cute purse tote! If you aren’t recognizing the stamps and paper that I used for these projects, it’s because they are brand new releases coming in the new Occasions mini catalog in January. As usual, this mini is chock full of amazing new stamps and accessories and this gift pack features the new Oh Sew Suite. There are stamps, rub-ons, fabrics, buttons, brads, paper and trims all with this adorable sewing theme. So much fun!

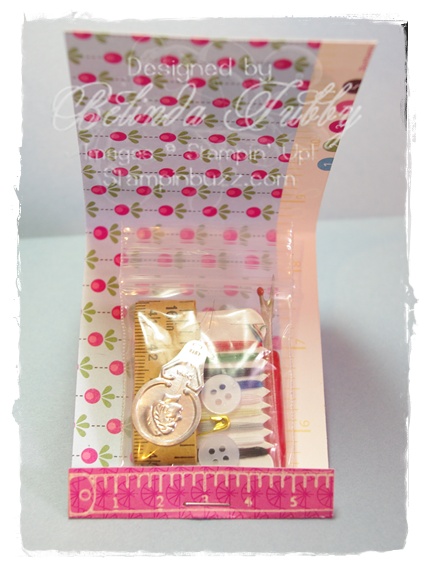
To create the purse tote, I used the Fancy Favor and Scallop Envelope Bigz dies as well as the Tasteful Trim die. The sewing kit is put together like a matchbook, with the small ziploc bag stapled inside. There is still room in the little purse tote to add a lip balm, candies or any other handy purse necessity you may think of.

Sew Suite

Thanks for stopping by!

Belinda


Stamps

Sew Suite ~ Just Believe

Ink

Melon Mambo ~Bashful Blue ~ Very Vanilla

Paper

Melon Mambo ~ Whisper White ~ Bashful Blue ~ Sweet Stitches DSP

Fun Stuff

Big Shot ~ Fancy Favor Box ~ Scalloped Envelope Die ~ 1 1/4″ punch ~ 1 3/8″ punch ~ Basic Rhinestones ~ Tasteful Trim ~ Sweet Stitches fabric brads ~ key ring ~ Cropadile

Simply Adorned Necklace

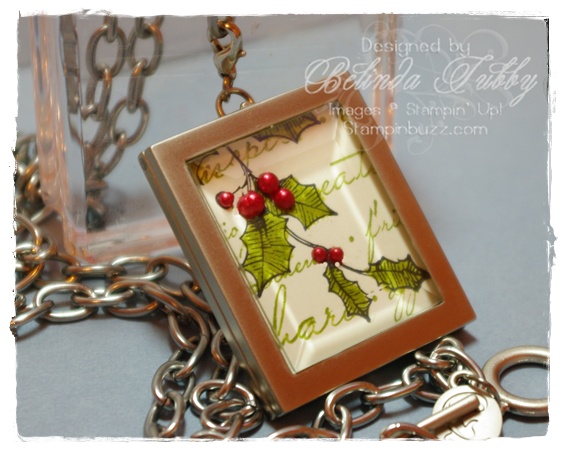
I’m back with another gift idea, the second in my 12 gifts of Christmas series. This is one of our wonderful Simply Adorned charms. These are just beautiful in person. The quality is very nice. It is a little bit of a change to stamp small, but a lot of fun once you get the hang of it! This charm is 1″ by 1 1/4″. I decorated it for the holiday season, but the sky is the limit with these. You can add photos, go artistic, funky or fun.

If you are going to give these as a gift you could stamp an insert for each month of the year and give that along with the charm. If you order the Simply Adorned bundle, these are the two pieces you will get. We have bracelets and smaller ones suitable for charms in our Simply Adorned line. You could also make lovely ornaments or key chains with these.

Tip: You can see that the holly berries are 3 dimensional. I used our white shimmer paint mixed with ink to color our pearls to make the berries.

Belinda


Stampin Supplies

Stamps

Bells and Boughs ~ Charming

Ink

Real Red ~ Old Olive ~ Black StazOn

Paper

Very Vanilla

Fun Stuff

Basic Pearls ~ Simply Adorned Charm ~ Simply Adorned 24″ chain ~ Shimmer White paint

Harvest or Thanksgiving Blessing Mix


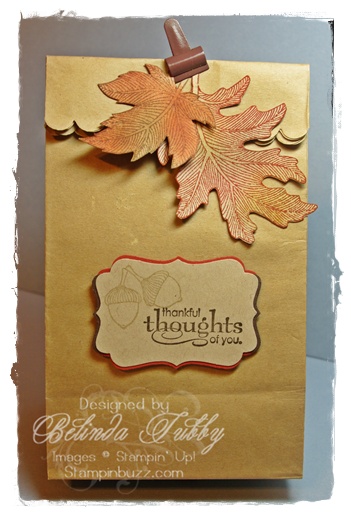
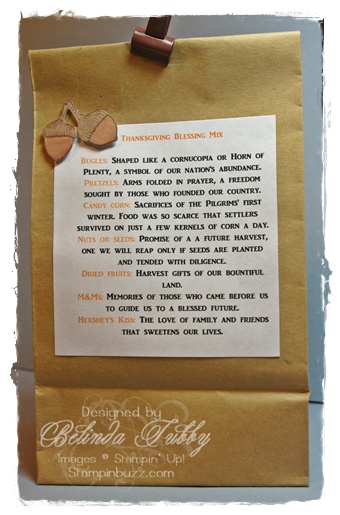
This is another project we did for stamp camp this month. We used the little brown paper bags from the Holiday mini catalog to present a gift of Harvest Blessing Mix. We have done this with a cello bag and topper in the past, but the harvest mix was the first thing I thought of when I saw these little bags! This is also called Thanksgiving Blessing Mix.
Harvest Blessing Mix
We stamped a quick tag using the new Decorative Label punch and sponged a couple of leaves from the Autumn Splendor set. The blessing mix ingredient list was printed off on the computer and attached to the back of the bag. You can find the printout with the recipe for the mix and the ingredient label here.

Enjoy!

Belinda


Stampin Stuff

Stamps

Autumn Splendor ~ Grateful Greetings

Ink

Crumb Cake ~ Cajun Craze ~ Early Espresso ~ Riding Hood Red

Paper

Cajun Craze ~ Crumb Cake ~ Early Espresso

Fun Stuff

~ Decorative Label punch ~ Mini Library Clips ~ Mini Lunchbags


Holiday Planner

Holiday Planner

 Holiday Planner

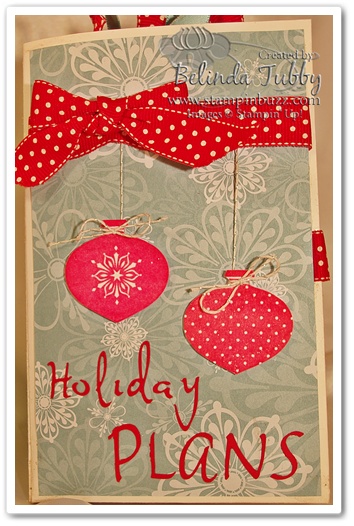
This is a fun little planner that I made to organize the information I’ll need for all of my holiday plans. Actually I use Microsoft One note to sort things out and then I’ll print things off and have a nifty little pocket organizer to carry them around with me, while I shop.

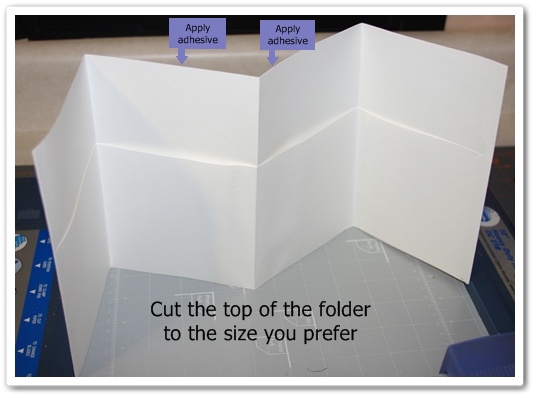
I used a regular school folder and cut it down so that it would be better sized to fit in my purse. I only had white ones on hand and so this paper from last years catalog worked best for what I had in mind. The folder is one of those simple class folders (no brads) that are available at back to school time for just pennies each. I cut about 4 inches off the top and then folded the back and front in half vertically. This gave me 4 pockets in an accordion fold.

Christmas Planner

I glued the two center pockets together from the back to make a center page rather than an accordion fold.

Organized Christmas

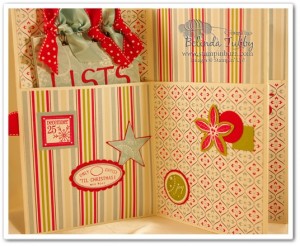
I  covered the front and insides with cut designer paper and stamped simple images to decorate each section. I didn’t have any red embossing powder and I wanted my titles to be opaque so I decided to cut them out with my Cricut machine. I thought it would be quick and easy. NOT! Gluing all of those skinny individual letters took forever!

planner

holiday Planner

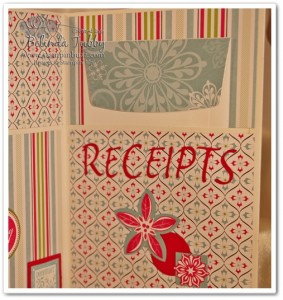
I used the last pocket for a receipt envelope. Of course, when the envelope is overflowing, there is more room in the pocket for extras.

planner

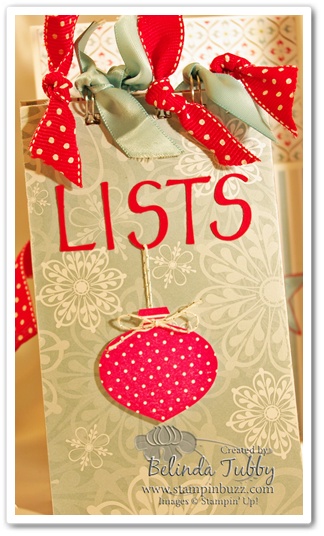
I covered two pieces of chipboard with DSP and included some note pages and then bound it all together and added ribbon and a stamped image to decorate. This will be a fun little place to keep lists of all kinds. Wish lists, shopping lists, menus, party needs, Christmas card list.

planner

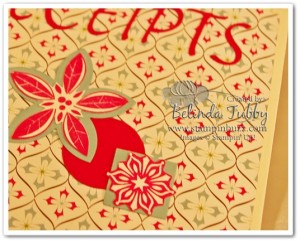
Decorating was quick and easy. Lots of punched pieces and a few cut out images.

Thanks for stopping by!

Belinda


Stampin’ Stuff

Stamps

Delightful Decorations ~ Spotlight on Christmas

Ink

Real Red ~ Baja Breeze

Paper

Real Red ~ Old Olive ~ Baja Breeze ~ Ski Slope DSP

Fun Stuff

Large Star ~ 5 Petal Flower ~ 2 3/8″ Scallop Oval Punch ~ 1 1/4″ Circle Punch ~ 1″ Circle Punch ~ 1 1/4 Square Punch ~ 1″ Square Punch ~ Red polka dot grosgrain ~ Baja Breeze satin ribbon ~ School folder ~ E-cut letters ~ Envelope ~ White twine


Oldie but Goodie!

Carrot boxes

I love these Carrot Boxes!

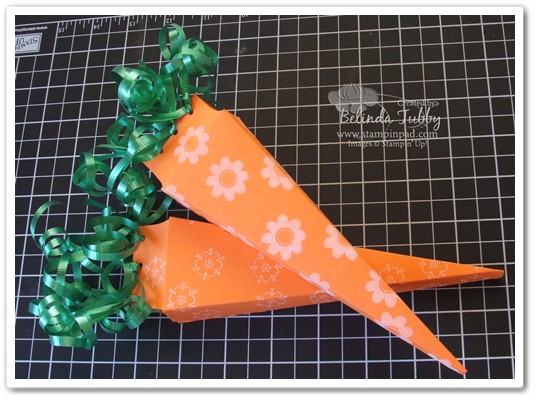
These are quick and fun little Easter boxes that we made  at stamp camp this month.  They have been around for awhile, but I bring them back often. They’re just so stinkin’ cute!

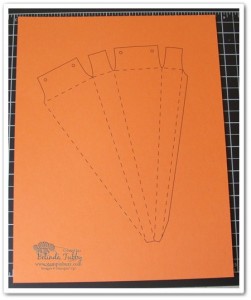
carrot box

Print the Carrot Box Pattern onto your card stock

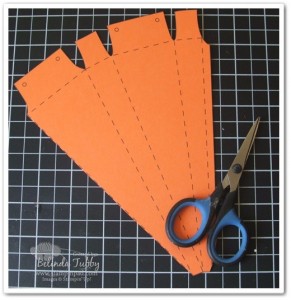
carrot box

Cut on solid lines

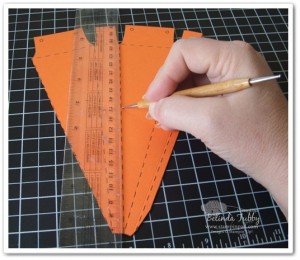
carrot box

Score on dotted lines.

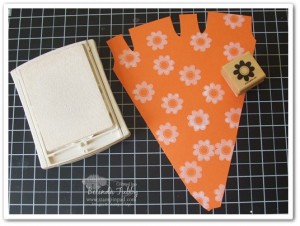
carrot box

Stamp using Whisper White Craft Ink.

I used flowers from Cheep Talk and Playful Petals sets, but any spring type image would be cute. You could also stamp tone on tone instead of white or even use bleach. I would place edibles in a cello or plastic bag if using bleach.

Stamp on the print free side of the card stock, the score lines will be on the inside of your box.

carrot box

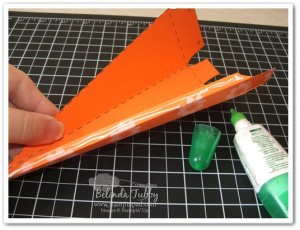
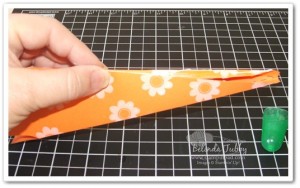
Add glue to the slim flap. The glue will go on the outside or stamped side and then fold into the box.

carrot box

The Tombow Multi glue grabs quickly and makes a very sturdy bond. You could also use sticky strip tape.

carrot box

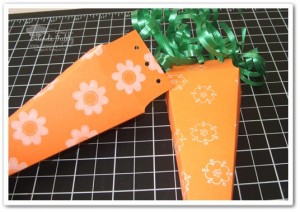
Punch holes through both flaps using the 1/8th hole punch and then add strands of curling ribbon to each hole and curl. I used three strands through each hole, each strand about 12 inches long.

Thanks for stopping by!

Belinda


Cello Topper

Spotlight on Christmas

I wanted to make a quick post with a little more detail on the Big Shot.

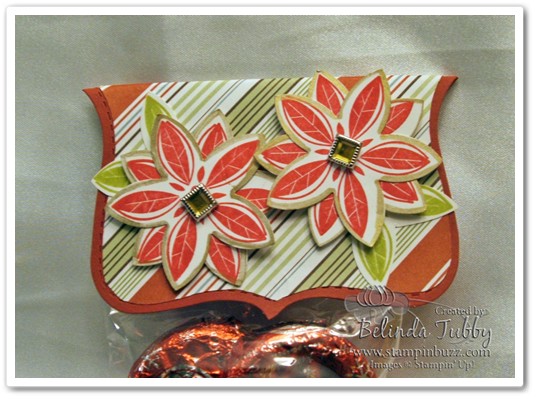
This cello topper was made using the Top Note Bigs Die.

Very quick little project using the Spotlight on Christmas set and the 5 petal flower punch. The designer paper is trimmed around the perforated edge to make a nice layer.  The flower petals are edged with a gold pen. I wish I had some neat chocolates for the cello bag, but had to settle for york peppermint patties. The good stuff keeps disappearing ……………

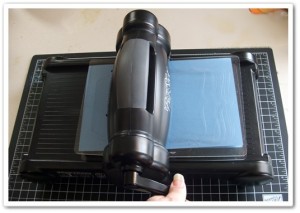
Big Shot

This is the Big Shot die cutting machine. The dies roll through the machine which puts pressure on them to cut or emboss the paper.

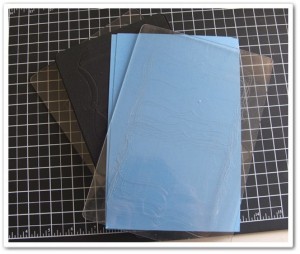
Big Shot

You will use a die, paper, and cutting mats layered together to form a “sandwich”. Different dies require different sandwich configurations, depending on how thick it is.

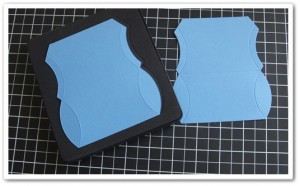
Big Shot

This is the pillowbox die after it comes through the machine. Some dies have score or perforation lines.

You can view the dies that are available in the back of the Mini Holiday Catalog by clicking on the link on the right.

Happy Stampin’

Belinda


Welcome to my blog!

Welcome to my new website and blog! I am so excited to finally be posting.

The purpose in creating this site was to have a place for you, my wonderful stamping friends to be able to find the wealth of stamping techniques and samples that we have explored over the last 10 years! (I know, I can’t believe it has been that long!) I spend a lot of time surfing the web for ideas and then when I do find something I like, I can never find it again.  So, I wanted a site that was easy to navigate and one which makes it easy to find  what you are looking for. I hope you enjoy it. Please be patient with me as I upload content. I am going to try to update a lot of the stuff I have, but you will also find some old favorites here.

I really had not intended to become a blogger, but I found that this format was the best for what I wanted to do. So, don’t expect posts every day or even every week! When there is something new and exciting at Stampin’ Up! I will post it on my blog and I will post projects here from time to time as well. Some days I will just be posting to the gallery or the tutorial page, and some days I will just be tending to my family, home and customers.  My goal here is to collect a wealth of resources for my wonderful customers. I hope you find it useful. Please feel free to remind me of projects or techniques that you would like to see added.

I want to give many, many thanks to Jen Clendineng for building my site for me and for her patience! I told her what I wanted, and then changed my mind about a hundred times and she built exactly what had been rolling around in my head. How she made any sense of it, I’ll never know! Thanks so much Jen!  Thanks also to Melissa Kulesa for creating my adorable banners.

And now to my first tutorial!

Happy Blessings box

I love my new Big Shot (the new die cut machine and dies from Stampin’ Up!)! I saw a box made from the Scallop Envelope Bigz Die. I don’t know how the original was done, but this is what I came up with.

die cut box

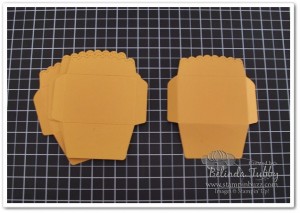
Cut 4 envelopes using the Scallop Envelope Bigz Die.

I have had good luck with cutting through 4-5 pieces of card stock at a time, but for good scored edges I just cut 2 at a time.

die cut box

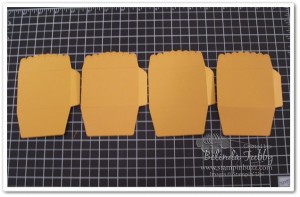
Cut one of the side flaps off of each die cut. Be sure to remove  the same side each time.

die cut box

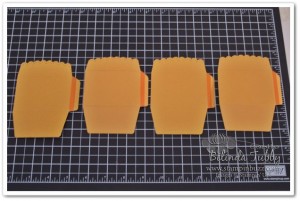
Add sticky tape right next to the scored edge of the flap for a good looking edge.

I like to use permanent adhesive for three dimensional projects like this.  Our tombow multi would also work well.

die cut box

Attach each envelope to the next, in the order shown above.

Use a bone folder to get a really good bond.

die cut box

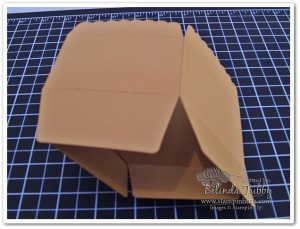
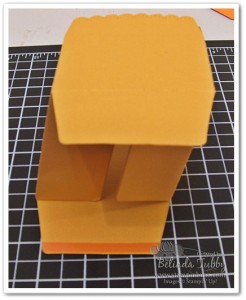
For the bottom, fold in two of the flaps and then add sticky strip to the the bottom two as shown and fold in.

die cut box

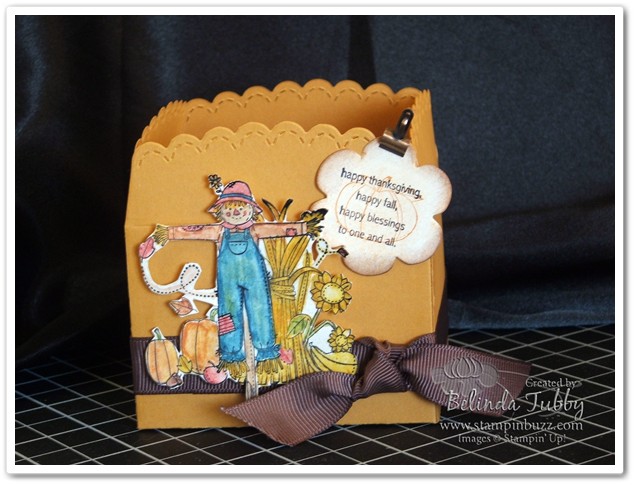
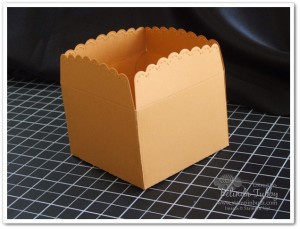
You will create an open ended box that has a really cute scalloped edge. I love it!

Happy Stampin’!

Belinda