Timeless Talk in Black and White

timeless talk

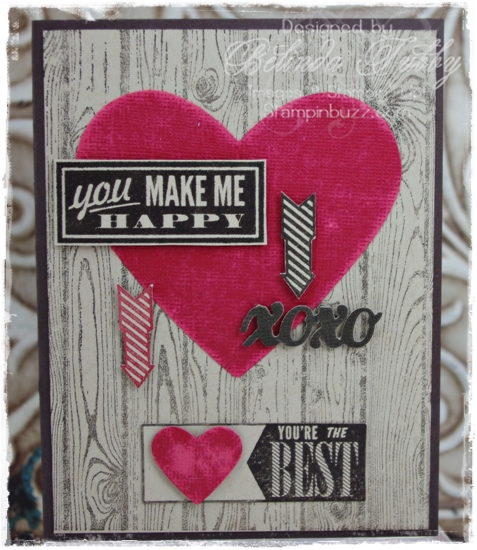
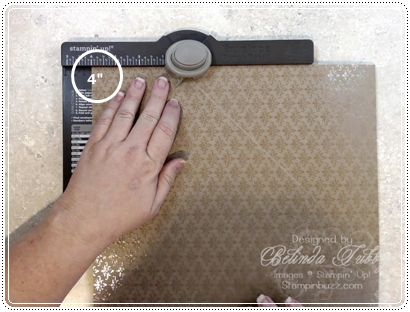
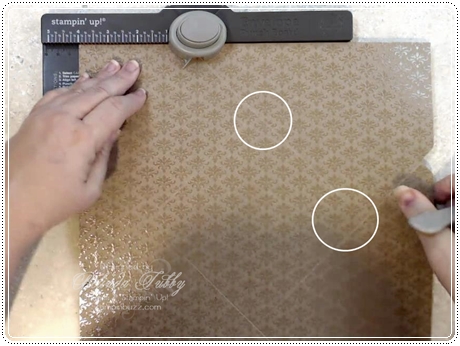
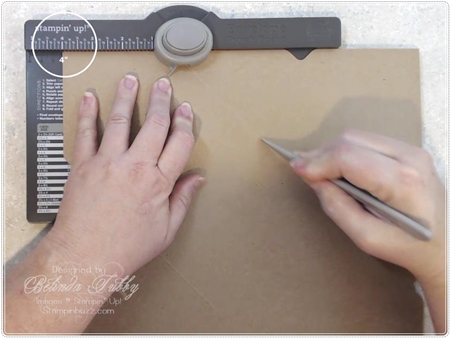
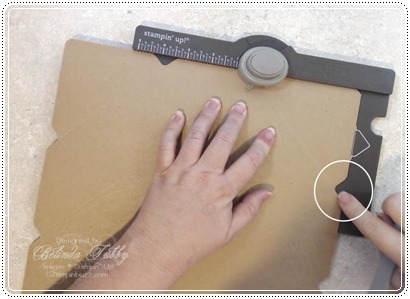
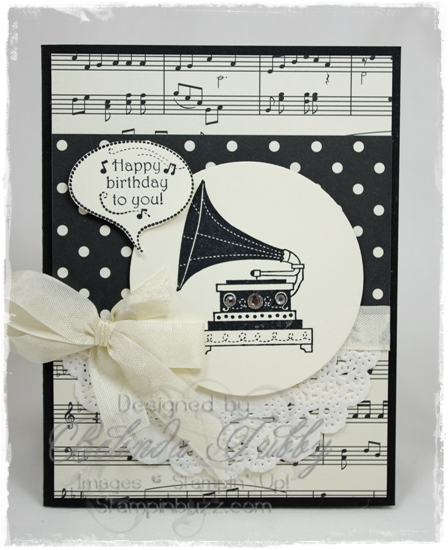
Here is a card we did for workshops last fall. Timeless Talk is one of my very favorite, and one of the most popular sets from the current catalog. I love that the style is contemporary and vintage at the same time. I decided to use the Modern Medley DSP which is perfect for the Black and White color technique, even though the paper is black and vanilla. Close enough. The technique is simple enough. Design something using only the colors Black and White. It makes stunning cards.

Stamp something happy today!!

Belinda


Stampin’ Stuff

Stamps

Timeless Talk

Ink

Black StazOn

Paper

Basic Black ~ Very Vanilla ~ Modern Medley DSP

Fun Stuff

2 1/2″ Circle punch ~ Lace Paper Doilies ~ Very Vanilla Seam Binding ~ Basic Rhinestones


Animal Talk Valentine

Animal Talk

These aren’t traditional colors, but this set makes the cutest valentines! Especially when paired with these sweet little hearts from the retired Sweet Shop DSP. I stocked up on this fave DSP while it was on the Clearance Rack, so it will show up for some time still in my creations.

I used markers to color the stamp. I stamped an extra bird and popped it up over the first. The sentiments for this set are really cute (click the link in the table below to take a peek). It is very easy to change them up, making this set very versatile; by just stamping or printing something different on a separate strip of paper and then popping it up over the part you want to replace. Sweet stuff.

Thanks for looking!

Belinda


Stampin’ Stuff

Stamps

Animal Talk

Ink

Old Olive ~ Island Indigo ~ Bermuda Bay ~ Wisteria Wonder Stampin Write Markers

Paper

Whisper White ~ Wisteria Wonder ~ Sweet Shop DSP

Fun Stuff

Scallop Border punch ~ Corner Rounder Punch ~ Island Indigo bakers twine ~ Wisteria Wonder bakers twine


What Does the Fox Say?

life in the forest

life in the forest

I have to admit that I bought this set, just so I could make a “What does the fox say?” card for my grandbaby. The set isn’t my style so much, but I NEEDED that fox! The rest of the critters are growing on me though, and I have thought of several other cute card ideas already.

This had to be the valentine for Aubrey this year though, because she LOVES the song and plays it over and over. I downloaded it to her little tablet that she got for Christmas, so I wouldn’t have to listen to it any more!! If you don’t know what I am talking about, just google “What does the fox say?” and watch the video. A spoof gone viral. Way beyond viral, actually.

Just basic stamping here, and I used blender pens and ink pads to color in the fox and trees.

Aubrey, who is in pre-k this year, pointed out that I needed to color more carefully and try to stay inside the lines. I tried to explain that it was a watercolor method which gives the artist creative license to go outside the lines on occasion and that it actually lends itself to the fluid, unconfined nature of the technique. Or something like that. She interrupted me mid explanation with an impatient pat on the hand and said “It’s OK Nana, just try to do better next time.” Ah, Mrs. Roy….. grasshopper has learned well. I felt like giving myself a punch on my behavior ticket and putting myself down for a nap. I am pretty sure she’s not going to buy my story of artistic intent on the over spray of smooch spritz inside the card either, but I have learned my lesson. That’s my story and I am sticking to it.

Aren’t the Word Bubble framelits a HOOT though!??! I love them and I think they will be used A LOT. Scrapbook pages, cards, This and That. So many fun ideas.

I hope you get to stamp today!!

Belinda


Stampin’ Stuff

Stamps

Life in the Forest ~ Delightful Dozen

Ink

Cajun Craze ~ Bermuda Bay ~ Baked Brown Sugar ~ Black StazOn

Paper

Pool Party ~ Whisper White ~ Fresh Prints DSP stack

Fun Stuff

Big Shot ~ Circle framelits ~ Word Bubble Framelits ~ Owl Builder punch ~ Blender Pens ~ Blushing Bride Smooch Spritz


Sale-A-Bration Banner Blast

follow my heart

Sale-A-Bration starts tomorrow! I used one of the free items that you can earn during this favorite Stampin’ Up! promotion. The two banners with the hearts are from the Banner Blast set that has a matching punch. The gold heart vellum is from the new Spring Occasions catalog.

I embossed the sentiment and then cut the heart with a framelit and layered the vellum over the sentiment. All of the images are stamped in Versamark ink and then coated with gold embossing powder and heat embossed. Very old school valentine and technique, with the red and gold, but I kind of like it!

Thanks for looking!

Belinda


Stampin’ Stuff

Stamps

Follow My Heart ~ Banner Blast

Ink

Versamark

Paper

Cherry Cobbler ~ Fancy Foil Designer Vellum

Fun Stuff

Big Shot ~ Hearts framelits ~ Banner Punch ~ Gold embossing powder ~ Embossing Heat Tool ~ Gold bakers twine


Spiral Flower Die

Spiral flower die

I played with some fun new things from the new Occasions catalog! First, I lOVE this new DSP paper stack called Fresh Prints. I love these patterns and colors, and this is my favorite from the pack, I think (today anyway)!

This is the first flower I have made with the new Spiral Flower Die. These are so easy to make! Just run them through the Big Shot and then roll them into a flower. So much fun! I unmounted the wheel from the Clearance Rack and that gave me a bunch of cool Valentine sentiments. Easy Peasy.

Thanks for dropping by today!

Belinda


Stampin’ Stuff

Stamps

I {love} Love wheel

Ink

Cherry Cobbler

Paper

Regals Core’dinations ~ Primrose Petals ~ Fresh Prints DSP stack

Fun Stuff

Big Shot ~ Hearts framelits ~ Spiral Flower Die ~ Sanding System ~ Brights Glimmer Brads ~ Pool party bakers twine


Follow My Heart

follow my heart

I love how this color combination turned out! I used Pool Party, Blushing Bride and Primrose petals together. So sweet! This card went together very quickly, thanks to the Banner Blast set and matching punch that are two of the FREE items you can earn during Sale-A-Bration. It is coming up quickly!

Sale-A-Bration starts next Tuesday, January 28th and runs through March 31st. Earn one of 13 free items created just for this promotion with each $50 purchase. You can also receive an additional $30 in hostess goodies when your personal stamp party reaches $300 in sales.

I hope you get to stamp today!

Belinda


Stampin’ Stuff

Stamps

Follow My Heart ~ Banner Blast

Ink

Blushing Bride ~ Pool Party ~ Primrose Petals

Paper

Blushing Bride ~ Pool Party ~ Whisper White ~ Primrose Petals

Fun Stuff

Big Shot ~ Perfect Polka Dots EF ~ Hearts framelits ~ Banner Punch ~ Retired Heart Punch ~ Pool Party Bakers Twine


Hello Lovely

Hello Lovely

The stamp set I used for this card is called Hello Lovely. In spite of that, the Hardwood background stamp gives it a masculine feel and I love the trendy look that the Hello Lovely set lends to it. Inside the card is a die cut I {heart} U. There are a bunch of fun little die cuts like these that come with the two flip card thinlits. Lots of fun goodies!

Thanks for looking today!

Belinda


Stampin’ Stuff

Stamps

Hello Lovely ~ Hardwood

Ink

Early Espresso ~ Cherry Cobbler

Paper

Cherry Cobbler Core’dinations ~ Neutrals Core’dinations ~ Early Espresso ~ Crumb Cake

Fun Stuff

Big Shot ~ Hearts framelits ~ Circle Card Thinlets ~ Label Card Thinlets


A Little Something

I know. Bad blogger. Bad. Blogger. I have no excuse. Just a confession. I have fallen madly in love and just couldn’t tear myself away from my new dearest. No need to tell my husband. He is smitten as well. Meet Pyper Eden. She insists on being held all the time and I am happy to oblige her. Being a Nana is the best thing in the whole world.

pyper

Since mommy is able to drive and back on her feet, I guess it is time to get back into a routine and stop neglecting all of my other duties.

I have a few things to share, even though it is very difficult for me to get into creative mode with so many things to distract me. Since I haven’t taken any photo’s yet, I’ll share some “extra” projects that haven’t made it to the blog yet.

Hearts a Flutter

This is a lollipop cover. I’ll try to put together a tutorial for these with the dimensions. They are really easy. I will probably make some version of these for Aubrey’s school party this year. Quick and fun. I used the Hearts A Flutter set and framelit for this one and the More Amore from last years Spring Catalog. As luck would have it, this paper is now on the clearance rack and very inexpensive! There are some really great prints in this pack and some fun laser cut heart doilies. You can check it out at the link below.

Thanks for stopping by!

Belinda


Stampin’ Stuff

Stamps

Hearts a Flutter ~ Itty Bitty Banners

Ink

Real Red ~ Whisper White

Paper

Pool Party ~ Very Vanilla ~ Primrose Petals Core’dinations ~ More Amore DSP

Fun Stuff

Simply Scored Scoring tool ~ Big Shot ~ Bitty Banners framelits ~ Hearts a Flutter framelits ~ Lollipop


Be Merry Gift Box

punchboardbox8

Today I have tutorial to share. This is a gift box made from a 12 x 12 piece of card stock. I used our Natural Composition specialty DSP because it is a thicker card stock and it has beautifully embossed images on it, so your box is already decorated. After a little scoring and punching with the Envelope punch board, you make 4 simple cuts and then fold your box and tie it up. Add a quick tag for a beautiful gift presentation. The finished box is 5 1/2″ square and 2 3/4″ deep. Enjoy the tutorial!

Begin with a 12 x 12 piece of card stock or dsp. Line each side of the cs at 4 inches, punch and then score as far as you can on the board.

Punchboard Box

It won’t score all the way across. Just score as far as you can, because the next step will finish the score line for you. In the picture below you can see where the lines don’t quite meet.

punchboardbox2

Flip the card stock over and do the same thing from the back. Line the edge at 4 inches and score down till your lines intersect with the score lines from the other side. These lines will form the box bottom. The lines that extend beyond the box bottom to the edges of the card stock, will form your box sides.

punchboardbox3
Line the bottom edge of the v punch with the scoring groove on the punch board as shown below and score again to create your box side and flap. You are still scoring from the back.

punchboardbox4

Cut in from each side as shown to create your flap, which will allow the box to fold in. Be sure to only cut up to the score line.

punchboardbox5

When you are finished cutting, opposite sides of the box should have 2 side flaps, which will fold in to secure the sides of the box. The opposing sides will not have side flaps, only a flap which will help to form the box top. Add adhesive to each of the flaps and fold in to form the box.

punchboardbox6

Fold the top flaps in to close the box. You can secure with adhesive if you like. I add a punched circle under the bottom two flaps to make the box a little sturdier. Finish it off with a bow and tag!

punchboardbox7

Thanks for stopping by today!

Belinda


Stampin’ Stuff

Stamps

Be Merry

Ink

Old Olive ~ Red Sharpie marker

Paper

Whisper White ~ Natural Composition DSP

Fun Stuff

Big Shot ~ Chalk Talk framelits ~ Basic Pearls ~ Cherry Cobbler 1″ grosgrain ribbon


Perfect Blend Gift Box

perfect blend
I have a quick and easy gift option for you today, but first a little news. Stampin’ Up! has added a lot of new items to the Clearance rack. Go check it out and grab some of the fabulous deals. There are a lot of Christmas related items that have retired, including some great sets, punches, framelits and dies from last years Holiday Catalog! Click the link below to see them.

I used our Tag a Bag gift boxes to hold some Keurig K cups and candies, and slipped in a Starbucks gift card to make the perfect gift for my favorite coffee enthusiasts. You can substitute whatever works in the coffee maker of choice for a great gift for co-workers or teachers. Both of my daughters are crazy for Coffee and Rocket Brothers Iced coffees so they are getting these in their stockings. Of course, the Perfect Blend set had to be included in the mix! I stamped the image 3 times. Once each on Crumb Cake and Whisper White card stock and then again on the dsp. I cut parts out and paper-pieced the cup and popped it up on the tag from the Chalk Talk framelits. I love that tag, because it slips over ribbon so nicely!

Thanks for stopping by today!!

Belinda


Stampin’ Stuff

Stamps

Perfect Blend ~ Christmas Tagables (photopolymer)

Ink

Early Espresso ~ Cherry Cobbler

Paper

Crumb Cake ~ Whisper White ~ Cherry Cobbler ~ Season of Style DSP stack

Fun Stuff

Big Shot ~ Chalk Talk framelits ~ Tag a Bag gift boxes ~ Crumb Cake Seam Binding