Take it to Heart

OK, I think I am finally at the point where I can at least manage my recent health issues. In a nutshell, my sensitivity to perfume has grown so extreme that it has to be “managed”. Planning two hours ahead for a run to the post office or grocery store is a stretch for me, but the alternative really cramps my stamping regimen. Needless to say, I find the creative process impossible  when it feels like my head is being used for target and batting practice, simultaneously!

Speaking of changes, it is time for a new mini catalog and Saleabration begins a week from today! Saleabration runs from January 24 to March 31st this year and there are some wonderful FREE products to choose from. I’ll do a separate blog post with all the details this weekend and if you like free stuff, you will definitely want to check back!

Take it to Heart

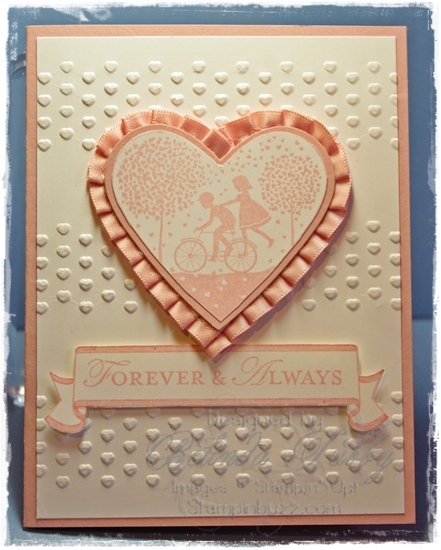
As usual, Stampin’ Up!  has filled the new Occasions Mini Catalog with exciting new products and wonderful stamp sets. I adore this set called, Take it to Heart. It works for valentines day and beyond and the banner stamp is one of my favorite things from the catalog! I’ll be using this with a lot of my other sets! I love, love, love the ruffled ribbon that I used to frame the image, so pretty. I love the new embossing folders for embossing the edges or just part of your card stock. I was already cutting my folders down to get this effect, but I must admit that is was always a little painful to make that first cut!

Belinda


Stampin’ Stuff

Stamps

Take It To Heart ~ Loving Thoughts

Ink

Blushing Bride

Paper

Whisper White ~ Blushing Bride

Fun Stuff

Big Shot ~ Hearts Framelits ~ Adorning Accents embossing folders ~ Blushing Bride pleated satin ribbon


Stitched Stockings

stitched stockings

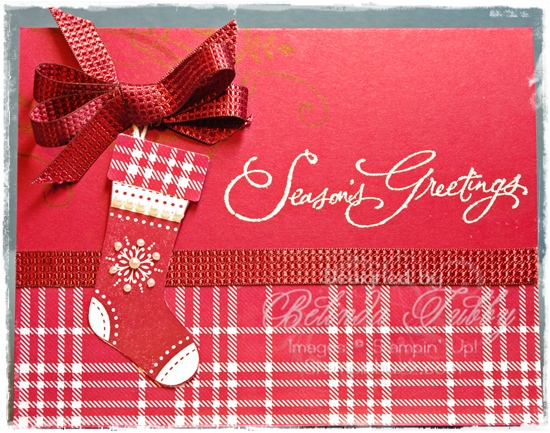
This is the first card I was able to put together with my pre-order from the yummy new Holiday mini catalog that goes live on September 1st. I can’t wait for you to see it! Until then, I’ll keeping posting fun little sneak peeks like this one! Isn’t the little Christmas stocking adorable? Even more fun is the matching Stocking Builder Punch that works with it! Love it! The Frostwood DSP is traditional, but with a masculine appeal. I’ll be using this one a lot this season. Last but not least, I have to bring your attention to the gorgeous new quilted ribbon. It comes in Cherry Cobbler and Chocolate Chip. Mmmmm, that even sounds yummy. I’ll be back tomorrow with more sneak peeks, so stay tuned!


Belinda


Stampin’ Stuff

Stamps

Stitched Stockings ~ Many Merry Messages ~ Baroque Motifs

Ink

Whisper White Craft ink ~ Cherry Cobbler

Paper

Cherry Cobbler ~ Whisper White ~ Frostwood Lodge DSP

Fun Stuff

Stocking Builder Punch ~ Cherry Cobbler quilted ribbon ~ White embossing powder ~ Embossing Heat Tool ~ White bakers twine ~
Basic Pearls


My Friend in Calypso Coral

My Friend

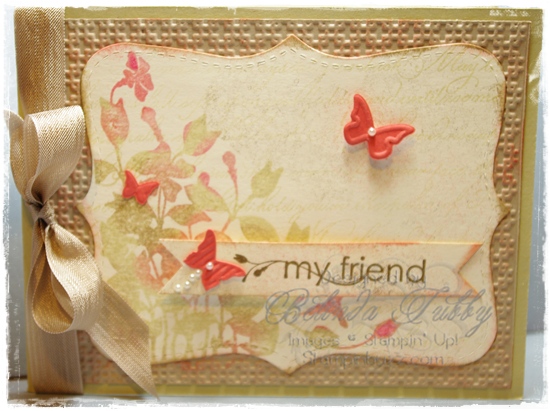
I really like this Calypso Coral. It is one of the new In Colors. It’s so bright and cheery, the perfect focal color to go with this otherwise neutral card.  I love the summery feel that it gives. To get the variegated look, I covered the stamp with River Rock ink and then used a sponge dauber to dab on a little Calypso Coral and Soft Suede. Then I stamped the image on the card stock. I had already stamped the  retired French Script stamp in River Rock ink, for a nice background.

I hope you get to stamp today!

Belinda


Stampin’ Stuff

Stamps

My Friend ~ French Script

Ink

Calypso Coral ~ River Rock ~ Crumb Cake ~ Early Espresso ~ Soft Suede

Paper

Crumb Cake ~ River Rock ~ Calypso Coral ~ Very Vanilla

Fun Stuff

Big Shot ~ Top Note Die ~ Square Lattice EF ~ Beautiful Wings Embosslits ~ Crumb Cake Seam Binding ~ Basic Pearls


Jolly Old St. Nick

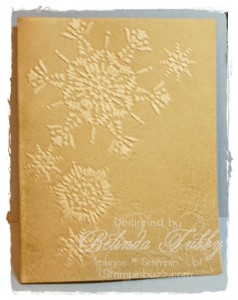
This card uses so many of my favorite new toys from the Holiday Mini Catalog that I don’t know where to start!  First, the new Textured Impressions Embossing Folder called Northern Flurries. It coordinates with the Northern Hearts hostess set. Love it! I’ll explain in a minute how I colored the snowflakes and snow man, but first let’s talk about that adorable little snow guy! This is another favorite thing(s) from the upcoming mini (should be arriving in your mailbox in 2-3 weeks). The cute snowman comes from an adorable retro Christmas set called Jolly Old St Nick. These images all remind me of Christmases past.

I also love this sentiment set called Bright Christmas, it has 3 holiday sentiments using gorgeous, festive fonts. The clear mount set is only $10.95, a really inexpensive way to update a set you may already own.
Finally, the glittery snowflakes are a new decorative strip die for the Big Shot called Northern Frost. This die has 8 different snowflakes in varying sizes. I used the two smallest flakes for this card. The die also coordinates with the Northern Hearts set, as well as the Northern Flurries folder.

I loved the little tag made with this set from the Holiday mini, it is what inspired this card.The snowflakes and snowman appear to have been colored a lighter color than the card stock when it is actually the opposite. The rest of the card stock has color added to it to make the images pop. The snow man is simply stamped in Early Expresso Ink on Crumb Cake card stock. The scarf, hat and gloves were colored with Crumb Cake ink and cut out. I used the Tea stain distress ink from the new distressing kit to age the card stock behind the popped up image.

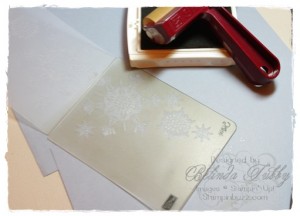
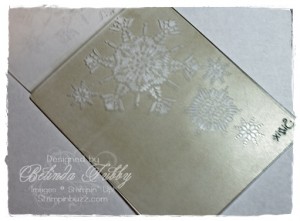
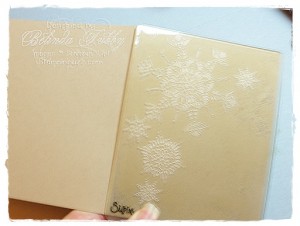
I used a brayer to ink up the relief side of the embossing folder with Crumb Cake ink to make the lighter colored snow flakes as shown.

The relief side is the side that has the snow flakes that are not elevated, so that when you apply ink it would cover all of the portion of the folder that would not emboss the card stock

Use a fairly heavy layer of ink

Place the card stock in the folder as you normally would to emboss.

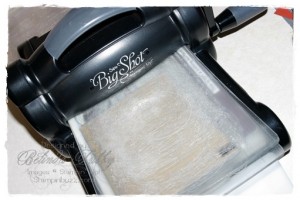
Run it through the Big Shot

The Ink will cover the card stock where there is no embossing, just like a relief stamp.

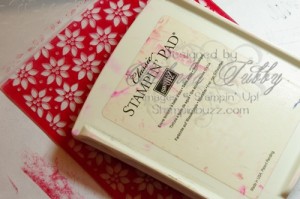
If you don’t have  a brayer, you can apply the ink directly from the ink pad, as shown

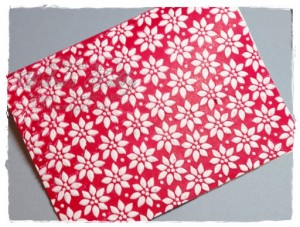
For this piece I used Real Red classic Ink on Whisper White card stock with the Petals a Plenty folder

Oh, and I forgot to mention, we will be stamping this card at Stamp Camp this week.

Hope to see you there!

Belinda


Stampin’ Stuff

Stamps

Jolly Old St Nick ~ Bright Christmas

Ink

Crumb Cake ~ Early Espresso ~ Tea Stain distressing ink

Paper

Crumb Cake

Fun Stuff

Big Shot ~ Northern Flurries TIEF ~ Northern Frost decorative strip ~ Dazzling Diamonds glitter


Autumn Splendor

Autumn Splendor

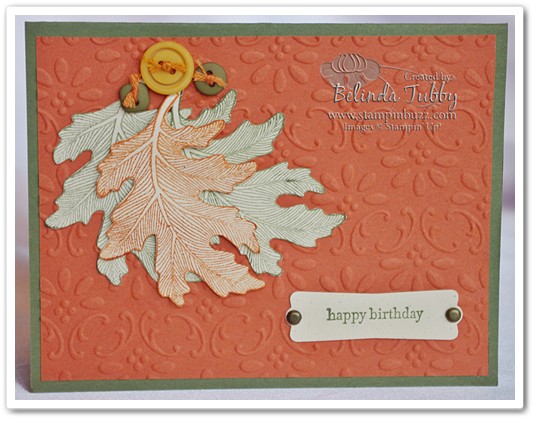
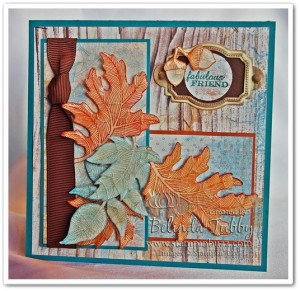
More fall fun with the Autumn Splendor set! These are cards we have been doing at workshops and Stamp Camp this month. Both are very simple in design but the embossed background really adds such a beautiful effect to the card, and it is so easy to do! Just slide your cardstock into the folder and then run it through the Big Shot Machine.

For this card we just added a few cut out leaves, buttons and a punched sentiment.

Stampin’ Stuff

Stamps: Autumn Splendor and Teeny Tiny Wishes

Inks: Really Rust and Always Artichoke Classic Inks

Paper: Naturals White, Really Rust and Always Artichoke card stock

Fun Stuff: Big Shot Machine and Finial Press Embossing Folder, Modern Label Punch, Vintage Brads, Earth Elements Buttons, Embroidery thread, Mini Glue Dots

Autumn Splendor

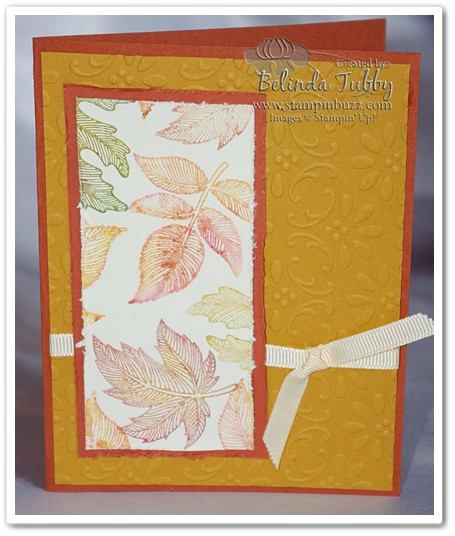
This card also uses the Autumn Splendor set and no ink! We stamped the image using the watercolor crayons. This is a fun technique to use when you need gradient color and this is the perfect set for it! Simply apply the color directly to the stamp with the crayon. Be careful to make sure the entire image is colored. Use two to three colors on your image. When you have applied the crayon, spritz the stamp with a fine mist of water and then stamp directly onto your cardstock. The water will blend the colors and you will get a lovely watercolor effect.

Tip:When adhering embossed or textured card stock, I like to use our Tombow Multi glue for a more permanent bond.

Stampin’ Stuff

Stamps: Autumn Splendor

Paper: Very Vanilla, More Mustard and Really Rust card stock

Fun Stuff: Big Shot Machine and Finial Press Embossing Folder, Very Vanilla 1/4 inch grosgrain Ribbon, Watercolor Crayons, Distressing tool from the Cutter Kit

I hope you get to stamp this week!

Medallion

Medallion

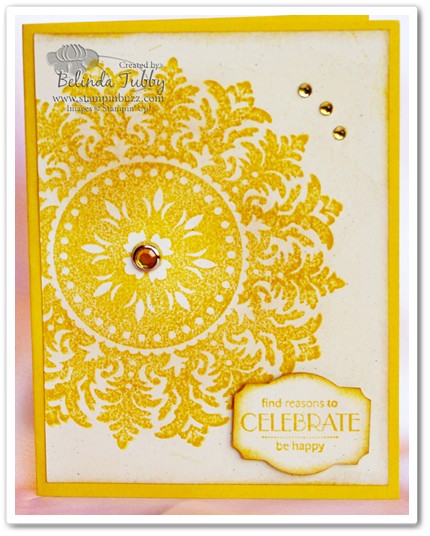
I finally got to play with my Medallion background stamp from the new catalog. As you can see, this stamp is not really meant to stay in the background. It makes quick and beautiful cards which can be used for many occasions.

This is a card that we made for stamp camp. You’ll recognize the Circle Rhinestone brad from the catalog, which really adds some elegant dazzle to the card. It needed something more to balance the card design, though. I thought about adding three of the smaller circle brads, but it seemed too much and I didn’t have enough on hand anyway. So what to do? That brings us to my new fave tip for all of those times when you don’t have just the right embellishment on hand. Re-color something you do have on hand!

In this case I mixed a drop of Crushed Curry Ink with some Crystal Effects and added a small drop on top of a rhinestone. I used this same technique on the pearls from the Pretties kit with the From the Crypt card in a previous post. The neat thing about Crystal Effects is that it usually will stay contained where you place it and will form a nice little mound. That is what it did here. The key is playing with it and seeing how much you need. Too much, results in a running or spreading effect. Just the right amount will mound up nicely. It is better to start with too little and add more if necessary. The CE will blend out if you have to add more. These kind of resemble a dew drop but have a little more depth and sparkle, very pretty.

You can also color the rhinestones and pearls using Sharpie or alcohol markers if you have the right colors on hand. Our dye based Stampin Write markers will also color the jewels. They need some drying time and sometimes two or three coats to get the desired color. I dab them with a soft tissue to remove excess ink before applying them to my projects.

These are all great ways to get that perfect added touch to your project

Happy Stampin!

Belinda


Stampin Supplies

Stamps

Medallion ~ Sweet Serendipity

Ink

Crushed Curry ~ Creamy Caramel

Paper

Crushed Curry ~ Naturals White

Fun Stuff

Crystal Effects ~ Basic Rhinestones ~ Fire circle rhinestone brads


Cracked Glass Technique

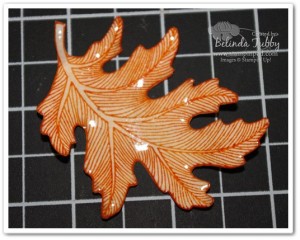
Here is a tutorial on how to do the Cracked Glass Technique from my previous post. For this card, I stamped and cut out the image. You could however, simply cover any watercolored image and get a dramatic effect.

Cracked Glass Technique

Take the image you want to cover and smush (technical term) it down into a Versamark Pad. Versamark Ink is a clear watermark medium that remains wet for a while, so it is perfect for embossing. It has a little bit of a sticky consistency which really grabs embossing powder. You need a clear ink for this technique. Regular embossing ink would work well. Just don’t use a tinted one.

Make sure your image is completely covered with the Versamark.

Cracked Glass Technique

Sprinkle Glassy Glaze Embossing Powder over the entire image. Glassy Glaze is a thick embossing powder. The granules are much larger than in the detailed powders. This powder is preferable, because you want a really thick coat for your final piece. It would take many more coats of a finer powder to achieve the same result. If you don’t have a glassy glaze any clear powder will work, with additional coats.

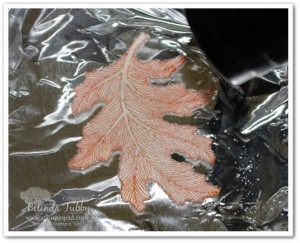
The next step is to heat the powder until it liquefies, leaving a shiny coating on your piece. You will need a heat gun specifically for this technique. We carry an excellent one in the catalog which is very high quality.

Cracked Glass Technique

If you do not have a heat gun, you can sometimes emboss by heating your piece from the backside over a hot iron.  I don’t suggest it with this technique though, because the very thick coat becomes messy and difficult to work with, and would probably leave a permanent mess on your iron.

I frequently am asked if you can use a blow dryer to emboss and unfortunately, you cannot. A blow dryer doesn’t get hot enough to melt the powder and the fan is too powerful and will blow all of your powder away.

I like to line a box with tin foil and place my piece down inside the box. The foil helps it heat more quickly and evenly and the piece is more contained inside the box.

Cracked Glass Technique

After your powder has melted and cooled, repeat the previous steps 2-3 more times until you have a very thick coating of the shiny glaze.

Cracked Glass Technique

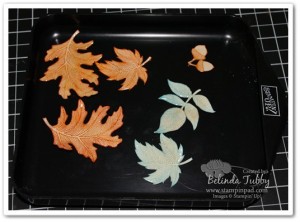
Place your embossed images on a tray of some kind and put them in your freezer.

If you don’t have access to a freezer where you are crafting, you can still get the same effect. You just have to let the images cool and cure till the glaze is hard enough to crack. The freezer speeds up the process.

Cracked Glass Technique

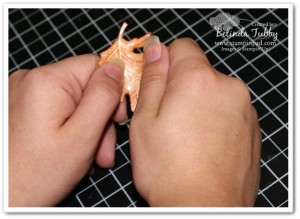
After about 10 minutes in the freezer, slightly bend or twist your piece to make several cracks. The key word here is slightly, too much exuberance in this step can make your glaze lift right off your image.

Refreeze if your piece needs to harden up in a specific area. It will become less brittle, the longer it is out of the freezer.

Cracked glass technique

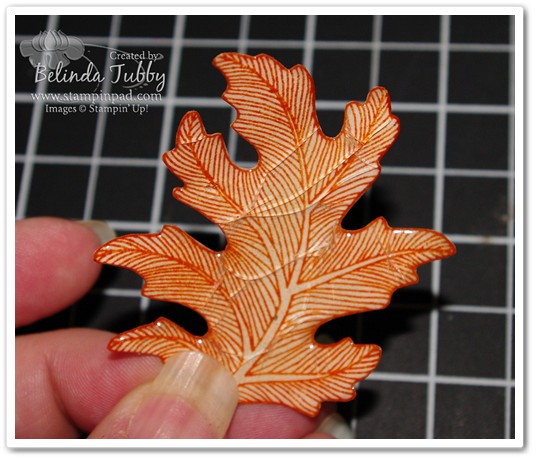
Your finished piece will take on the lovely look of a cracked piece of glass.

You can rub some dark ink into the crevices for a more antiqued look. The ink will also dull the shine a little, so experiment with this process to get the look you are happy with.

autumn splendor

Here is the finished card.

I hope you get to play with this technique soon. It really adds the WOW, to your artwork.

Happy Stampin’

Belinda