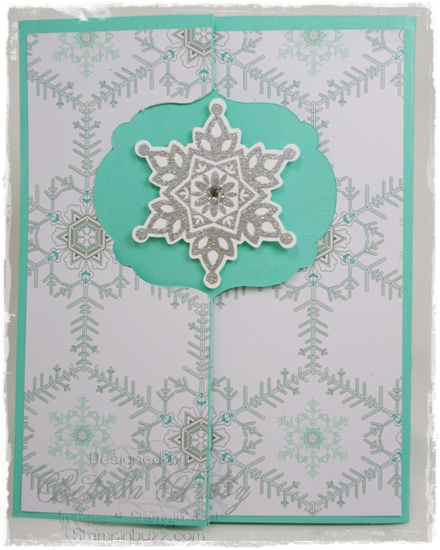
Festive Flurry Thinlet

Festive Flurry

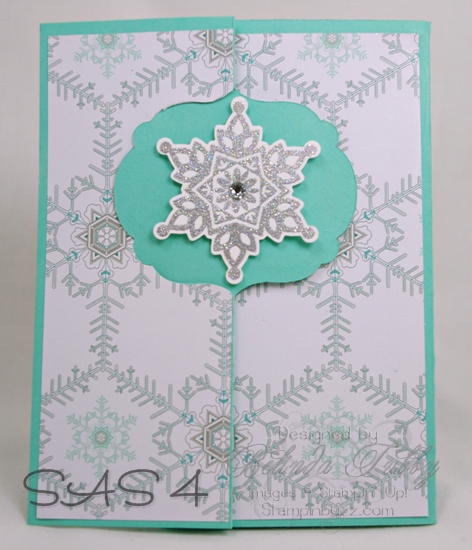
I have always loved making flip cards, but the process in the past was fairly involved. Our new thinlet dies make them so quick and easy! I extended the card by using a piece of card stock that was 8 1/2″ and allowed the end to sit over the back edge of the die rather than under it where it could be cut. Doing this makes a little line on your card that is the perfect place to fold it so that now you have a gatefold card with a flip mechanism as well.
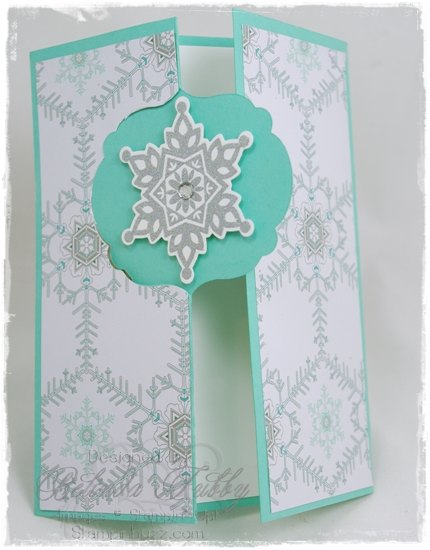
Festive Flurry

This picture shows the gatefold opening. The picture below shows the surprise greeting on the flip side and the message on the gatefold. I like this added  length to the card because there is still plenty of room to include a hand written message.
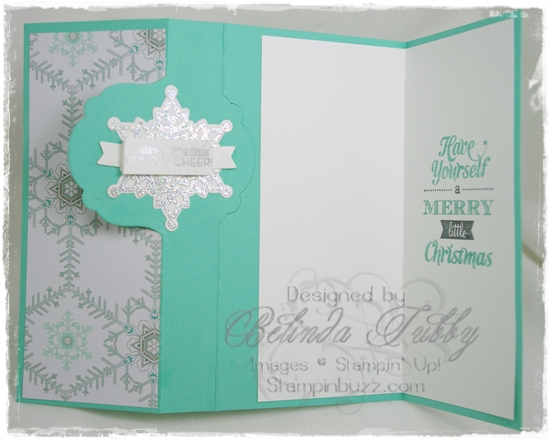
Thinlet flip card

Thanks for stopping by!

Belinda
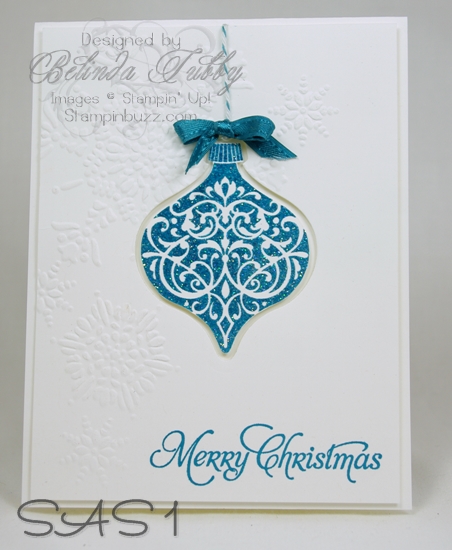
 

Stampin’ Stuff

Stamps

Festive Flurry ~ Merry Little Christmas ~ Christmas Tagables (photopolymer)

Ink

Silver Encore ~ Smoky Slate marker ~ Coastal Cabana marker

Paper

Coastal Cabana ~ Whisper White ~ Winter Frost DSP stack

Fun Stuff

Big Shot ~ Label Card Thinlets ~ Festive Flurry framelits ~ Iridescent Ice EP ~ Basic Rhinestones

Be Merry

Be Merry

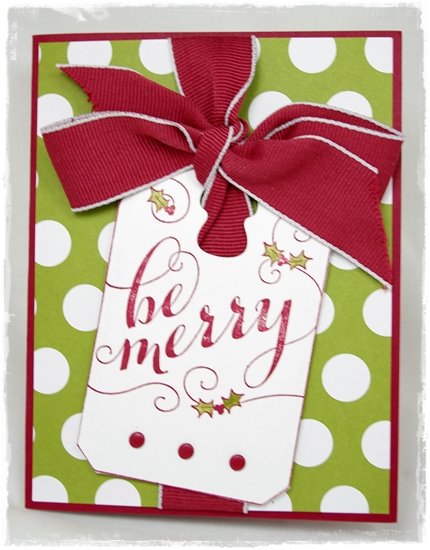
This is a quick and easy card using one of our single stamps called Be Merry.  It is very similar to our tag from the Chalk Talk set and so I was able to use the Chalk Talk framelit to cut the tag opening. I stamped the image (masking off the to-from at the bottom) I cut it out by hand (it is larger than the framelit) and then I slipped the top of the cut piece under just the metal piece that makes the cut out. The rest of the card piece was laying on top of the framelit and I ran it through the Big Shot.

I added a big bow using the 1″ grosgrain from the Holiday Catalog and a few Candy dots to fill in the open space at the bottom. Quick and easy!

Belinda


Stampin’ Stuff

Stamps

Be Merry

Ink

Cherry Cobbler ~ Old Olive Marker

Paper

Cherry Cobbler ~ Whisper White ~ Season of Style DSP

Fun Stuff

Big Shot ~ Chalk Talk framelits ~ Cherry Cobbler 1″ grosgrain ~ Regals Candy Dots

Cheers!

Cheers

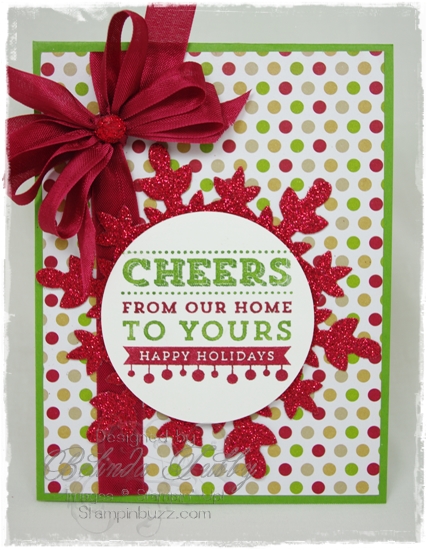
Here is a festive card for the Holidays! I wish the camera could catch the sparkle better, it is so much prettier in person. I love our glimmer paper for that reason, you get the glitter without the mess and the sparkle is just FABULOUS. In my head that sounded a lot like Jim Carrey with a finger snap at the end! The little brad is one of our glimmer brads, and even though the bow, ink and paper are Cherry Cobbler, somehow the red glimmer paper works and doesn’t look too “red”.

I hope you get to stamp something Christmasy today! [Yes, that is a word. It’s not in the dictionary, but it should be. Cheery, snowy, Christmasy. (Spelling may vary depending on my mood)]

Belinda


Stampin’ Stuff

Stamps

Cheers

Ink

Gumball Green Marker ~ Cherry Cobbler Marker

Paper

Gumball Green ~ Whisper White ~ Season of Style paper stack ~ Red Glimmer paper

Fun Stuff

Big Shot ~ Festive Flurry framelits ~ 2 1/2″ Circle punch ~ Cherry Cobbler seam binding ~ Brights Glimmer Brads


Wonderfall Thoughts

Wonderfall

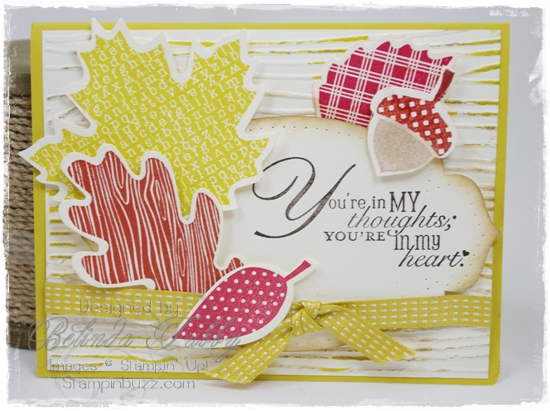
This is a card that we made for stamp camp last year that I never posted. We used a lot of tools for this one as you can tell from the supply list! It wasn’t a difficult card though, just stamping, sponging and die cutting. The die we used wasn’t a framelit, but rather a bigz die. The stamps are made to work with  the die; so the easiest way to use them together is to cut the card stock first, and then lay the diecut on the inked stamp with it facing image up. Then rub from the back of the paper.

Thanks for stopping by today!

Belinda


Stampin’ Stuff

Stamps

Wonderfall ~ Word Play

Ink

Summer Starfruit ~ Cajun Craze ~ Cherry Cobbler ~ Crumb Cake

Paper

Summer Starfruit ~ Very Vanilla

Fun Stuff

Big Shot ~ Autumn Accents Bigz Die ~ Wood Grain EF ~ Apothecary Accents Framelits ~ Essentials Paper Piercing pack ~ Paper Piercing tool ~ Paper Piercing mat ~ Summer Starfruit double stitched satin ribbon ~ Sponges


Joyful Christmas

Joyful Christmas

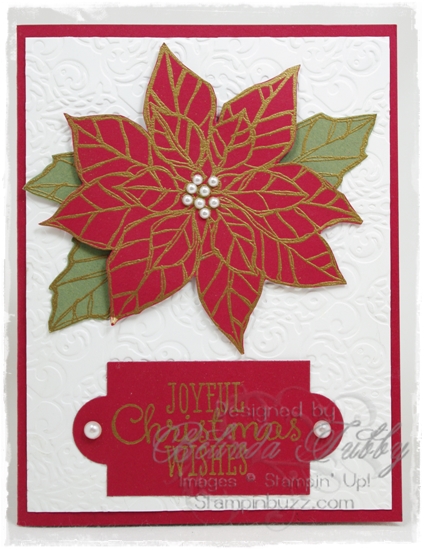
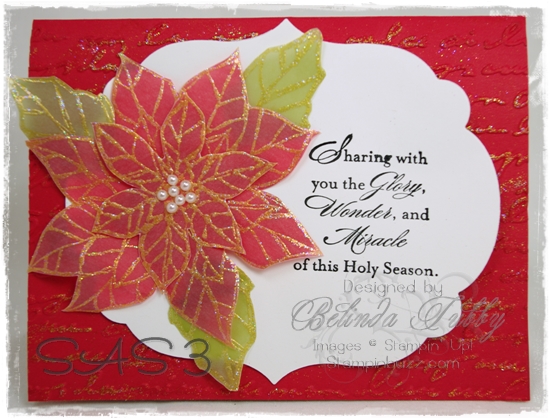
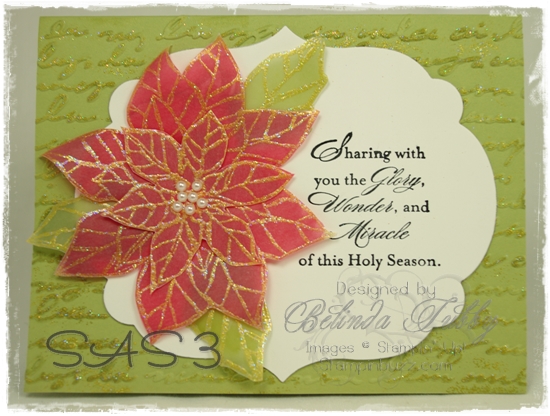
I have had to emboss this set every time I have used it. It just doesn’t need much else and the heat embossing is so pretty. The flowers and leaves are hand cut. That seems like a lot of work, but they really cut pretty quickly. I just popped them on a dry embossed background (retired folder) to finish the card.

I hope you get to stamp today!

Belinda


Stampin’ Stuff

Stamps

Joyful Christmas

Ink

Versamark

Paper

Whisper White ~ Cherry Cobbler ~ Garden Green

Fun Stuff

Big Shot ~ Apothecary Accents Framelits ~ Lacy Brocade TIEF ~ Gold embossing powder ~ Embossing Heat Tool ~ Basic Pearls


Holiday Sale

Holiday Sale!

Here is a huge list of items that are on sale Nov. 20 through Dec. 2! Don’t miss the three DoorBuster items today, though. They are on sale for ONE DAY ONLY, Wednesday November 20th.

Download the pdf file to see the rest of the sale items or view them in my Online Store!

Don’t forget our weekly, Tuesday Deals!

weekly deals 11 19

Thanks for stopping by!

Belinda
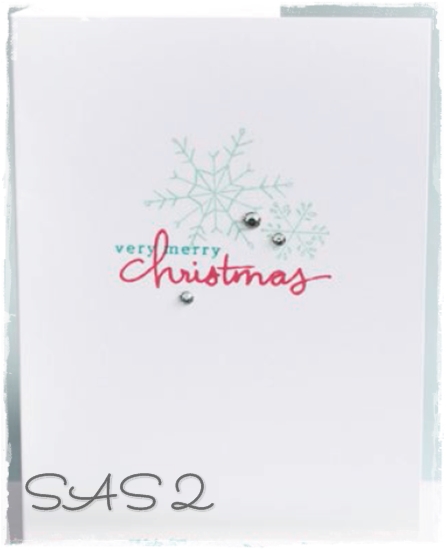
Christmas Stamp a Stack 2013

These are the card choices for Stamp a Stack, Stamp Camp next Thursday. I will be adding them throughout the day today.  Stamp Camp is next Thursday, November 14th, 6:00-9:00 PM at the Bixby Community Center. You must RSVP with your card choices to attend. Each stack is 5 cards of 1 design. Your first stack is $7.50 and each stack after that is $5.00 OR you can choose 5 stacks for $25.00. You may also stamp one of each card design for $10.00.

Ornament Keepsakes

Keepsake Ornaments

Endless Wishes

Endless Wishes

Joyful Christmas

Joyful Christmas

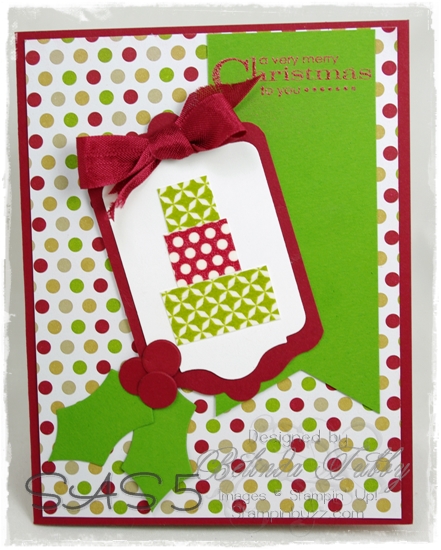
Let me know if you would rather do this one in green or red!

sas3

Festive Flurry

Flip Card

This is a flip card using the new thinlet dies. Backgrounds for this card may vary somewhat.

Wishing You

Wishing You

This is just a prototype of this card using washi tape. My Wishing You set won’t get here till Monday and that is the actual set I am using for this card. I am moving the layout just a little and there is a cute Santa from the Tag It set that can be used on this card also, plus varying backgrounds.

RSVP Here


Wetlands

Wetlands

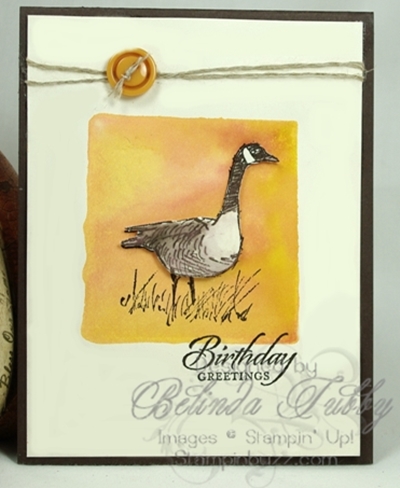
Here is a a simple but pretty card that we made at Stamp Camp this month.

The background is made by sponging (with daubers) ink onto a clear acrylic block and then spritzing with Alcohol. It needs to be fairly wet. Allow the colors to run together a bit and then “stamp” the block on your card stock to create the Background. I suggest letting it dry completely and then ironing the back of the card stock or pressing it in a book for a few days to straighten out any warping caused by the alcohol.

I stamped the goose image once on the background once it was dry and then stamped it again on Very Vanilla card stock. I used blender pens to color in the goose and then cut it out (just the body) and popped it up over the original stamped image. The sentiment, button and linen thread finished off the card.

I hope you are enjoying this lovely fall weather that is inspiring my creations! Be sure to check out the new weekly specials, packaging bundles and MDS specials for November. You can view them on my Specials Page.

Belinda


Stampin Supplies

Stamps

Wetlands

Ink

Cherry Cobbler ~ Early Espresso ~ Cajun Craze ~ Crushed Curry ~ Sahara Sand

Paper

Very Vanilla ~ Early Espresso

Fun Stuff

Sponge Daubers ~ Clear Block ~ Linen Thread ~ Retired button ~ Alcohol 90%


Another Thank You

Another Thank You

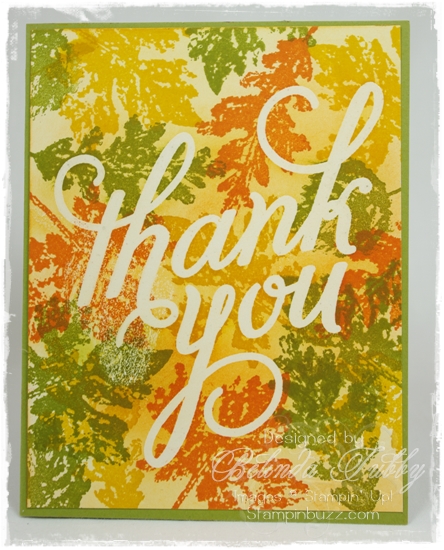
We used the embossing resist technique on this simple card that we made for Stamp Camp last month. Embossing resist is an easy technique where you emboss your focal image in clear ink on your white or vanilla card stock and then stamp over it with your background images. The ink won’t stick to the Clear Embossing (after it has been heated). When you wipe the ink away from your embossed image (with a soft tissue) the original card stock color shows through.

On this card we stamped the large Thank you image from Another Thank You on Very Vanilla card stock and then over stamped it with the background leaves from Gently Falling. We then sponged any remaining uninked cardstock with a light rub of So Saffron to make the entire image pop. Then we just layered that piece on our Old Olive card stock base. Easy Peasy.

Thanks for looking

Belinda


Stampin Supplies

Stamps

Another Thank You ~ Gently Falling

Ink

Cajun Craze ~ Crushed Curry ~ So Saffron ~ Old Olive

Paper

Very Vanilla ~ Old Olive ~ Versamark Ink

Fun Stuff

Clear Embossing Powder ~ Sponges ~ Heat Tool ~ Tissue


Spooky Treat Bag

Bite Me

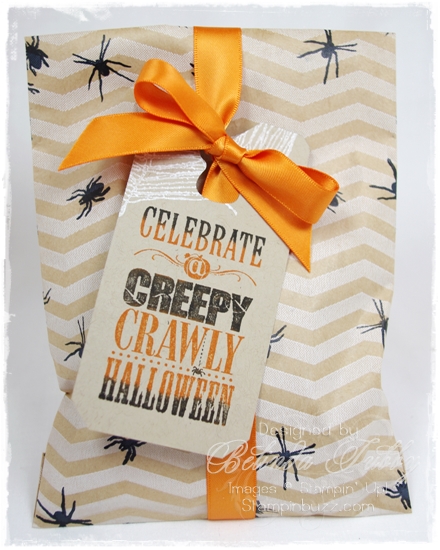
Most of the projects from my newsletter are different projects that you won’t see on my blog, but I had to share this one here. I love stamping directly on the treat bags and adding a simple tag.

The framelit from Chalk Talk is perfect for that. Not only does it have the opening at the top that lets you just pop it over your ribbon, since it is a framelit you can make it any length you want. I lengthened it to make the sentiment from Halloween Bash fit.

This bag holds 4 large Chocolate Chip cookies.  These bags are food safe, but to keep the oil from the cookies off the bag, I first packaged them in the food safe gusseted cello bags (on the clearance rack for only $1.59 for 25 bags!)

Thanks for stopping by!

Belinda
 

Stampin Supplies

Stamps

Bite Me ~ Halloween Bash

Ink

Whisper White Craft ~ Pumpkin Pie Marker ~ Basic Black Marker ~ Black StazOn

Paper

Crumb Cake

Fun Stuff

Big Shot ~ Chalk Talk Framelits ~ Tag a Bag gift bags ~ Cellophane Gusseted bags ~ Pumpkin Pie satin ribbon ~ Corner punch (retired)