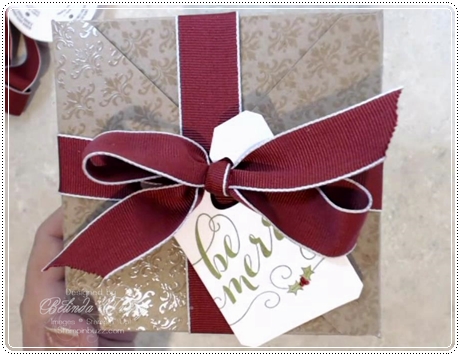
Today I have tutorial to share. This is a gift box made from a 12 x 12 piece of card stock. I used our Natural Composition specialty DSP because it is a thicker card stock and it has beautifully embossed images on it, so your box is already decorated. After a little scoring and punching with the Envelope punch board, you make 4 simple cuts and then fold your box and tie it up. Add a quick tag for a beautiful gift presentation. The finished box is 5 1/2″ square and 2 3/4″ deep. Enjoy the tutorial!
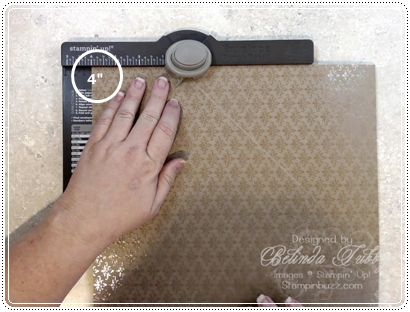
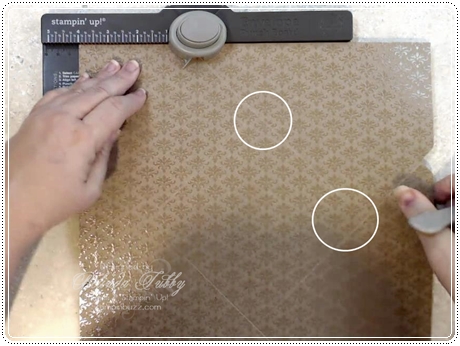
Begin with a 12 x 12 piece of card stock or dsp. Line each side of the cs at 4 inches, punch and then score as far as you can on the board.
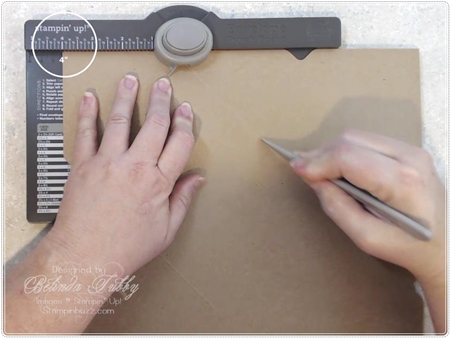
It won’t score all the way across. Just score as far as you can, because the next step will finish the score line for you. In the picture below you can see where the lines don’t quite meet.
Flip the card stock over and do the same thing from the back. Line the edge at 4 inches and score down till your lines intersect with the score lines from the other side. These lines will form the box bottom. The lines that extend beyond the box bottom to the edges of the card stock, will form your box sides.
Line the bottom edge of the v punch with the scoring groove on the punch board as shown below and score again to create your box side and flap. You are still scoring from the back.
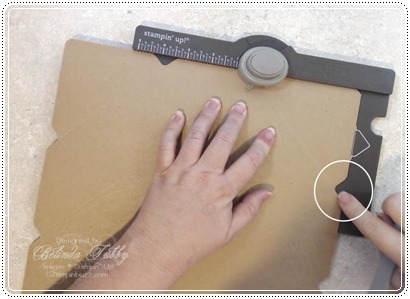
Cut in from each side as shown to create your flap, which will allow the box to fold in. Be sure to only cut up to the score line.

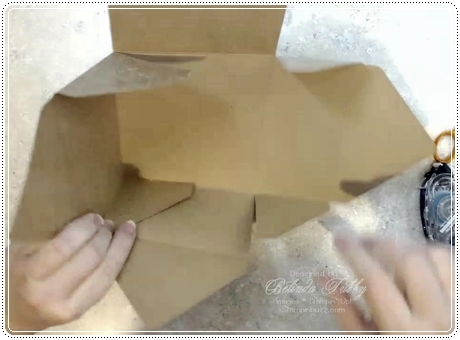
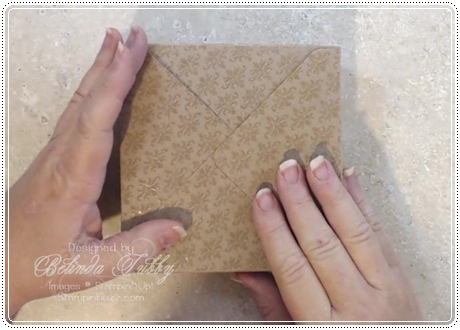
When you are finished cutting, opposite sides of the box should have 2 side flaps, which will fold in to secure the sides of the box. The opposing sides will not have side flaps, only a flap which will help to form the box top. Add adhesive to each of the flaps and fold in to form the box.
Fold the top flaps in to close the box. You can secure with adhesive if you like. I add a punched circle under the bottom two flaps to make the box a little sturdier. Finish it off with a bow and tag!
Thanks for stopping by today!
Belinda
Stampin’ Stuff
Stamps |
Be Merry |
Ink |
Old Olive ~ Red Sharpie marker |
Paper |
Whisper White ~ Natural Composition DSP |
Fun Stuff |
Big Shot ~ Chalk Talk framelits ~ Basic Pearls ~ Cherry Cobbler 1″ grosgrain ribbon |