Stampin’ Up! Online Extravaganza Begins Monday!

Online Extravaganza

Shop the Online Extravaganza November 19th through the 28th. Don’t miss the One Day Only Door Busters! Monday, November 19th ONLY get the Big Shot machine for only $79.95! The Big Shot Dr’s bag and the Simply Scored Diagonal plate are also on sale for 20% off, Monday only. But there are plenty of other great bargains to be had through the 28th. Check out the Online Extravaganza pdf for over 70 more products that are on sale for up to 50% off. Stamp sets, papers, accessories and much more.

Get ready to save big whether you shop in my online store or call or email your order to me. Let the savings begin!

Perfectly Preserved

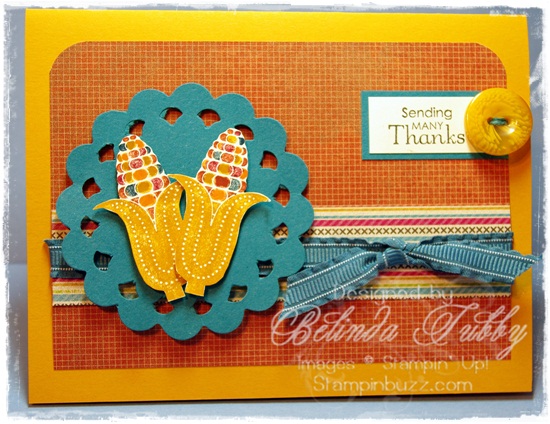
As I look out my office window, I can see just a few yellow and orange leaves  clinging to one or two trees in the yard. The weather has been just glorious the last few weeks and I find myself lingering in the yard and actually anxious to get outdoors and do yard work. There are so many sights, smells and sounds to be enjoyed this time of year when you live out as far as I do. It is one of the things I am most thankful for. The quiet solitude that just requires a simple stroll out my back door.  This card reminds me of the bounty of blessings I enjoy every day.

I used the corn image from the Perfectly Preserved set and the Orchard Harvard DSP.

Belinda


Stampin Stuff

Stamps

Perfectly Preserved ~ Petite Pairs

Ink

Early Espresso ~ More Mustard ~ Stampin’ Write Markers ~

Paper

More Mustard ~ Island Indigo ~ Very Vanilla ~ Orchard Harvest DSP

Fun Stuff

Big Shot ~ Perfect Pennants Die ~ Island Indigo Ruffled Ribbon ~ Regals Designer Buttons


Frankenstein Treat Box Tutorial

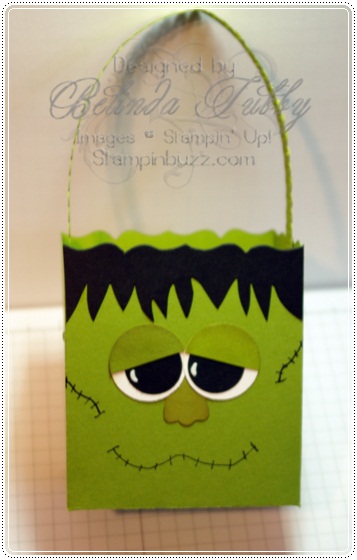
Fancy Favor Frankenstein Box

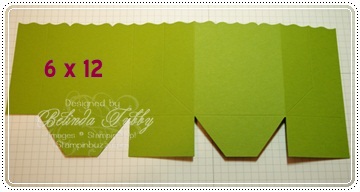
Create an adorable Frankenstein treat container using the Fancy Favor box die. Cut a 6 x 12 piece of Old Olive card stock and run it through the big shot with the Fancy Favor die. The die cuts and scores for you, so all you need to do is draw in the mouth and scars with a Basic Black marker. Do this on the front panel which would be the panel with the two gusseted sides. Use either liquid Tombow multi or Sticky strip adhesive to assemble the box.

frankenstein fancy favor box

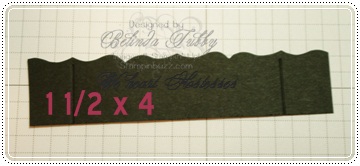
Cut a strip of Basic Black card stock that is 4 x 1 1/2 inches and place it on the die so that the top is trimmed to match the decorative edge.

Frankenstein fancy favor box

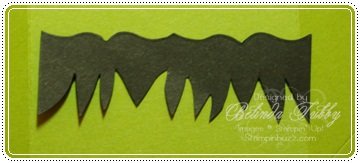
Trim the scored pieces off and hand trim the lower edge of the box so that it resembles Frankenstein’s hairline.

frankenstein fancy favor box

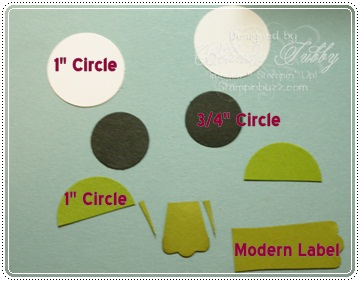
Punch the following pieces

  • Whisper White – Two 1″ circles
  • Basic Black – Two 3/4″ circles
  • Old Olive – One 1 inch circle (cut in half) and One Modern Label piece cut at about 3/4″ and trimmed along the sides as shown

frankenstein fancy favor box

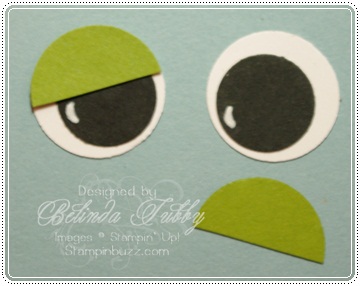
Draw a white crescent on each black circle, using the White gel pen. Glue the eyes together as shown. Sponge all of the punched pieces with crumb cake ink to make them stand out against the Old Olive box.

frankenstein fancy favor box

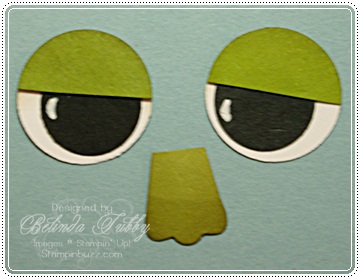
Cut a 1 x 11 inch piece of old olive card stock and punch with a border of your choice to create a handle. Attach the handle to the inside of the box using brads. Attach the hair, eyes and nose to the box as shown. Fill with candy or other spooky treats!

frankenstein fancy favor box

Enjoy!

Belinda


Wonderfall

Wonderfall

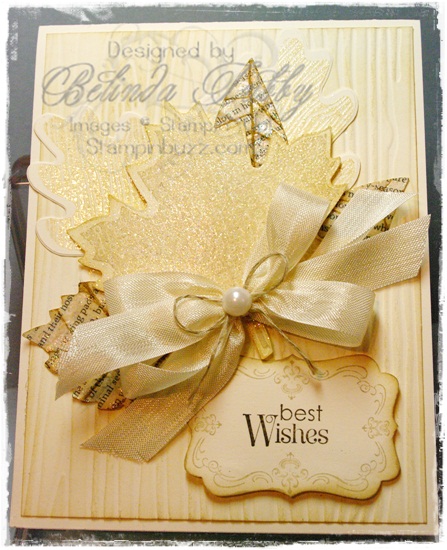
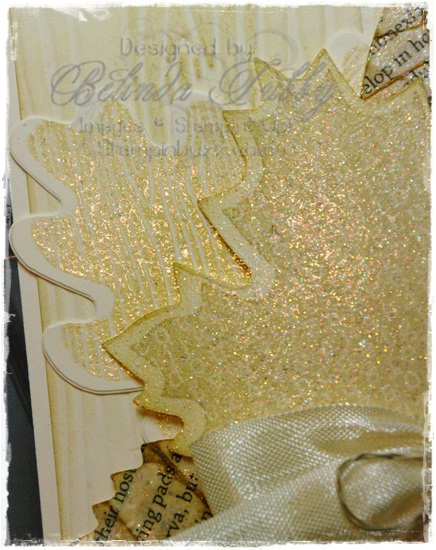
It finally feels and looks like fall around here! I am loving the weather right now and it put me in the mood to share this neutral take on a fall card. I added the best wishes sentiment as it seemed perfect for a fall wedding card. The next picture shows the sparkle and shine a little better. All of the leaves have been embossed with Iridescent Ice EP. I cut all of the leaves with the Autumn Accents die from the Holiday catalog, and then stamped the Very Vanilla pieces using the Wonderfall set. I cut other leaves from the First Edition DSP and then created veins by folding and then dragging the creased fold across a stamp pad to add the color. Then I did some sponging with tea stain and the other inks. I wanted a lighter fiber to put behind the pearl, so I bleached some of our linen thread. A little work, but I love the way it turned out!

Wonderfall

Thanks for stopping by!

Belinda


Stampin Supplies

Stamps

Wonderfall ~ Petite Pairs ~ Four Frames

Ink

Early Espresso ~ Crumb Cake ~ Versamark ~ Tea Stain

Paper

Very Vanilla ~ First Edition Specialty DSP

Fun Stuff

Big Shot ~ Autumn Accents Bigz Die ~ Wood Grain TIEF ~ Decorative Label Punch ~ Basic Pearls ~ Iridescent Ice EP ~ Very Vanilla Seam Binding ~ Linen Thread (bleached)


Batty For You

Batty for you

Happy Halloween! The weather has just been gorgeous the last few days. Perfect for the pumpkin patch and trick or treating or just about anything else you would want to do on a lovely fall day. My favorite time of year! Be sure to check back tomorrow for details on my Mystery Hostess event and other fun fall happenings!

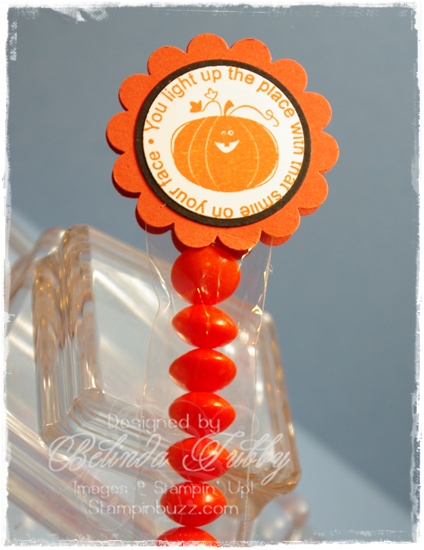
Here is one more quick and cute, treat bag topper using the Batty For You set. Just stamp and punch. This set always gets a workout this time of year. So many treats, so little time!

Thanks for stopping by!

Belinda


Stampin Supplies

Stamps

Batty for You

Ink

Tangerine Tango

Paper

Tangerine Tango ~ Basic Black ~ Whisper White

Fun Stuff

1 1/4″ Circle Punch ~ 1 3/8″ Circle Punch ~ 1 3/4″ Scallop Circle Punch ~ 1×8 Cello bags


Two Tags Candy Holder

two tags halloween candy holder

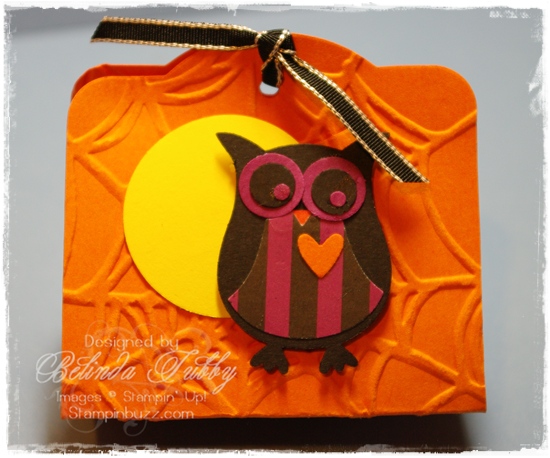
Here is a cute little Halloween treat holder. You can stack smaller candies inside, or use it as a band around a bundle of longer candy. These are quick and easy. Just cut two of the larger tags, using the Two Tags die and the Big Shot machine. Emboss the tags if you like, and then glue them together on the bottom fold. Fold the top half of the tags up to form a triangle and tie at the top. Fun stuff!

Thanks for stopping by!

Belinda


Stampin Supplies

Paper

Pumpkin Pie ~ Rich Razzleberry ~ Daffodil Delight ~ Basic Black ~ Retired DSP

Fun Stuff

Big Shot ~ Two Tags Die ~ Spider Web TEF ~ Owl Builder punch ~ 1 3/8″ Circle punch ~ 1/8″ Basic Black grosgrain ribbon


Batty Candy Cone

Batty Candy Cone

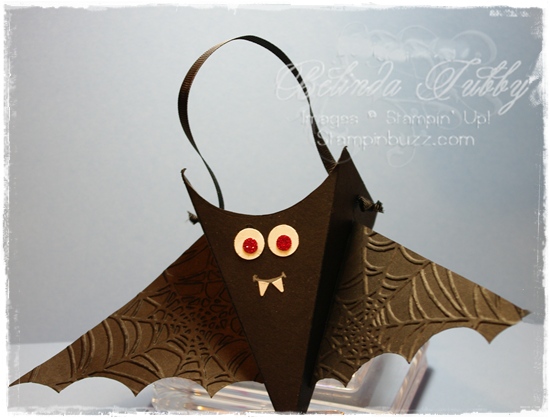
This is a cute little batty project that we made for stamp camp this month. Shelli shared it on her blog and I just had to copy it. Not much stamping, but it uses two of my favorite new dies; Perfect Pennants and the Petal Cone die. What a fun way to serve up your favorite Halloween treats!

Happy Stampin!

Belinda


Stampin Supplies

Paper

Basic Black ~ Whisper White ~ Red Glimmer paper

Fun Stuff

Big Shot ~ Petal Cone die ~ Perfect Pennants die ~ Circle framelits ~ Spider Web TIEF ~ 1 3/8″ Circle Punch ~ 1 1/4″ Circle Punch ~ 1/2″ Circle punch ~ 1/4″ Circle punch ~ 1/8″ Circle punch ~ Star punch ~ Basic Rhinestones ~ Basic Black grosgrain ribbon ~ White colored pencil


Candy Bar Wrapper Video!

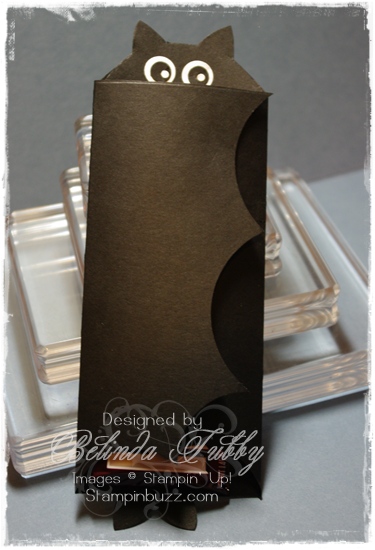
Halloween candy bar wrapper

Oh My! I have managed to create my first video, but I had no idea just how involved it would be. The whole process has been very time consuming for me, because I started from scratch! I had to learn how to use the camera and figure out how to mount it upside down over my desk, figure out lighting, learn editing software, you tube, and then how to embed it into my blog! So if you have been wondering where I have been, between this adventure, a few big family events and a stomach bug …… There were days that I was wondering the same thing myself! It’s good to be back!

Isn’t this little bat cute? I saw one that used a pattern  that was printed off and then cut out. I wasn’t sure how the ink would show up on black paper, but I also knew it would be easy to do using punches! So here is the final result of several adventures over the last couple of weeks.

My first video presentation for my blog.  I should explain that I hate most of it! Every frame is a lesson in what NOT to do next time, but it took so long to get to this point, there was no way that I was going to start over! The project is cute and fun though, and the video explains it well enough. I will be adding more videos and hopefully they will get better as I go along. I hope you enjoy it!

Thanks for stopping by!

Belinda


Stampin Supplies

Paper

Basic Black ~ Whisper White

Fun Stuff

Simply Scored Scoring tool ~ 2 1/2″ Circle Punch ~ 1 3/4″ Circle Punch ~ Owl Builder punch ~ 5 Petal Punch


Gently Falling Birthday

Gently falling

I designed this card with Darlingman’s birthday in mind.  It ended up with a little too much froufrou, but I gave it to him anyway! He didn’t seem to mind the girly touches.

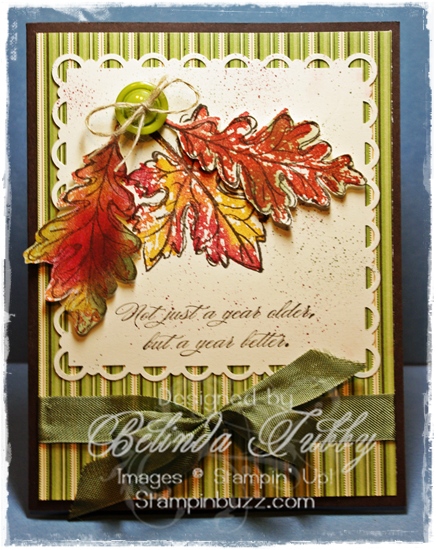
This card had a lot of steps, but nothing very difficult. The two step set makes it easy to create the leaves, by just sponging  the additional colors directly on the base stamp and then stamping the outline image over the top. Love, love, love this spice cake designer paper!

Thanks for stopping by!

Belinda


Stampin Supplies

Stamps

Bring on the Cake ~ Gently Falling

Ink

Early Espresso ~ Cajun Craze ~ Cherry Cobbler ~ Always Artichoke ~ More Mustard

Paper

Early Espresso~ Very Vanilla~ Spice Cake DSP

Fun Stuff

Scallop Trim punch ~ Scallop Trim border punch ~ Always Artichoke seam binding ~ Linen Thread ~ Designer buttons ~ Spritzer tool ~ Many Marvelous Markers