I am sure you are wondering what in the world I am doing posting a Santa punch art tutorial in May! For those who are signed up for my newsletter, I am doing a series through Christmas geared toward organizing and preparing for the holidays early. Each newsletter has a section on getting ready for the holidays and each month on the 25th I am going to dedicate a post here with the same theme. The idea is to set aside specific day for working on creating the most fabulous holiday we can imagine. The series theme is A Pinterest Christmas, so you know we have a million ideas on that! I chose the 25th of each month. Easy to remember. If you would like to play along, just sign up for my newsletter for the entire series. You can sign up by filling out the form in my side bar.
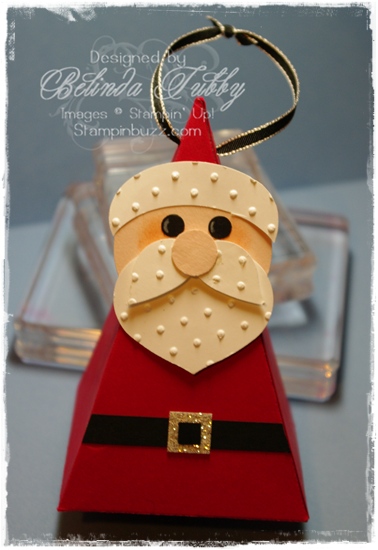
I was asked to share a tutorial for this punch art Santa as part of the series. Since this ornament punch is retiring at the end of this month, I decided that I better hurry and fit it in now! Originally I used it on this petal cone die box (also retiring, which makes me very sad!). This tutorial shows an additional step or two for creating a hat for the santa.
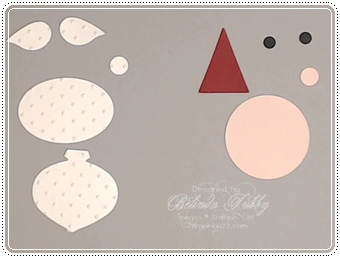
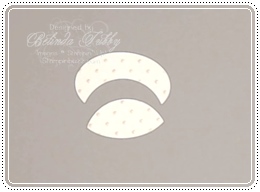
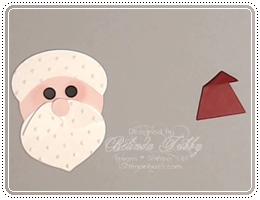
You will need to punch the pieces as shown in this photo. Emboss a Whisper White piece of card stock using the Perfect Polka dot folder and punch an ornament, a large oval, two wings from the Bird Builder punch and the circle from Itty Bitty shapes. Then punch a Cherry Cobbler pennant with the Pennant builder punch, Blush Blossom Itty Bitty circle and 1 3/4″ circle and then two 1/4″ Basic Black circles. When you are punching the wings for the mustache, punch one and then flip the card stock over and punch the debossed side. This way you will have two wings pointing different directions.
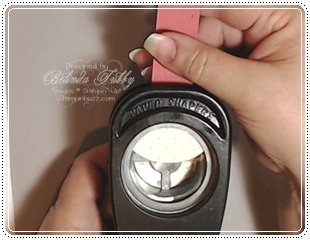
Create a handle for the Large Oval piece and use the 1 3/4″ circle punch to trim away part of the Large Oval as shown.
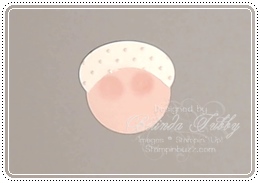
Attach the partial oval piece to the pink circle and sponge on some cheeks using a sponge dauber and Blushing Bride ink.
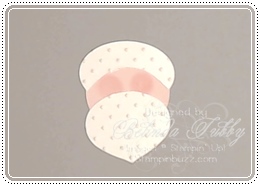
Trim off the top of the ornament and attach as shown.
Add the two wings to form the mustache. I did not pop these up for this sample, but I think I will from now on, it gives it more definition. Bend the pennant piece over as shown to form the hat.
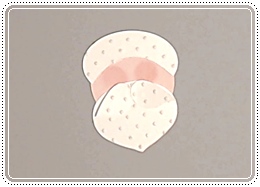
Add the white circle to make a pom for the hat and attach as shown.
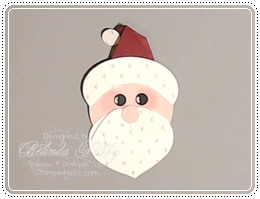
Finish the punch art piece by adding commas to the eyes, using a white gel pen.
Thanks for stopping by